
Hey! Listen! This post is part of a series on the Ubiquiti EdgeRouter Lite. Check them all out!
| Date | URL | Part |
|---|---|---|
| 2019-06-28 | Migrating away from the Ubiquiti EdgeRouter Lite | Migrated to a Netgate SG-1100 |
| 2019-02-03 | EdgeRouter CNAME records | Setup CNAME records |
| 2017-10-03 | Dyn DDNS on EdgeRouter | Setup DynDNS |
| 2017-04-25 | DuckDNS on EdgeRouter | Setup DuckDNS |
| 2017-01-08 | Ubiquiti EdgeRouter serial console settings | Serial console settings |
| 2016-11-29 | Ubiquiti UniFi controller setup on Raspberry Pi 3 | Install UniFi Controller |
| 2016-08-30 | EdgeRouter Lite Dnsmasq setup | Setup dnsmasq |
| 2016-06-13 | EdgeRouter Lite software upgrade | Firmware upgrade |
| 2016-05-12 | EdgeRouter Lite OpenVPN setup | OpenVPN server setup |
| 2016-04-29 | Ubiquiti EdgeRouter Lite setup | Initial setup |
Introduction
I’m planning on upgrading my EdgeRouter Lite (ERL) to the newly-released v1.9.1 (I’m following my upgrade guide). This time, I’m using a serial cable to connect to my ERL. This is the first time I’ve used serial, so I’m going to document the process.
Why serial?
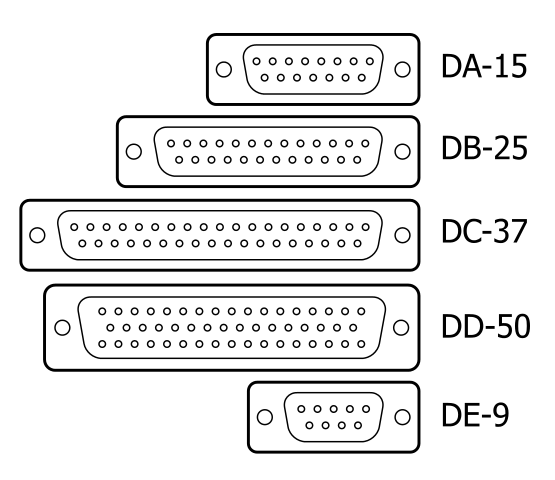
Serial connectors (standard RS-232) are often included on networking and enterprise equipment. Serial comes in a number of different physical connectors, called D-subminiature, including DB25 and DB9.
Serial is a very old technology, so why is it still around? Serial is slow, doesn’t transmit power, and isn’t good for runs longer than a few meters. However, serial is a very basic connection, which means is it reliable, simple, and is almost universal. In the case of the ERL, it is easy to break the configuration in a way that locks you out. You can assign the wrong firewall rule to the wrong port, disable password authentication and then delete your SSH keys, etc… Serial is an always-on, dead-simple, reliable connection to your ERL. The only downside is that you need to physically be connected to the ERL.
Serial connection
The ERL uses a standard ethernet serial port, so you’ll need a RJ45 (ethernet) to DB9 (serial) adapter. If your computer doesn’t have a DB9 serial port, you’ll also need a DB9 to USB adapter. If you only want to use one cable, you can use an all-in-one serial-to-usb cable, like this one from Amazon. If you’ve ever used Cisco products, any teal Cisco serial cable will work (Ubiquiti did that on purpose).
The serial settings for Ubiquiti products are listed on the Ubiquiti website, and shown below.
- Baud rate: 115200
- Data bits: 8
- Parity: NONE
- Stop bits: 1
- Flow control: NONE
Those same settings are sometimes abbreviated in the format shown below.
115200 8N1 OFF
Windows
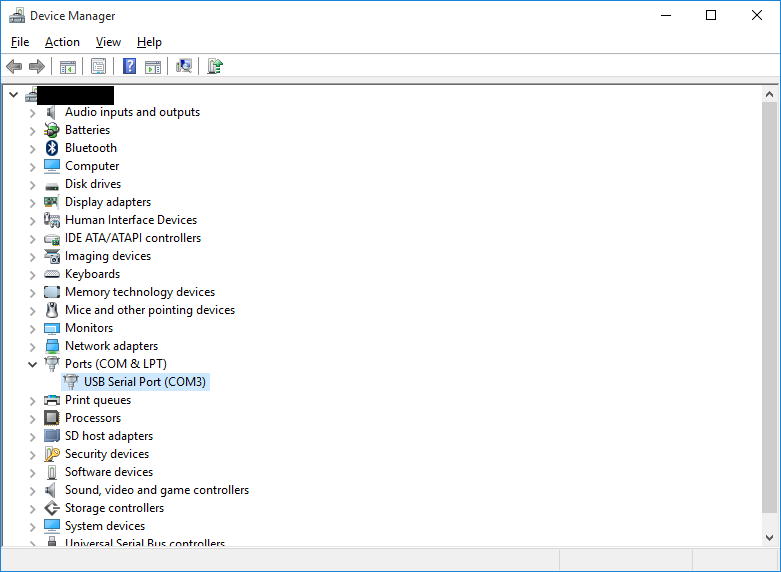
First, check Device Manager for your COM port. In my case, it was COM3.
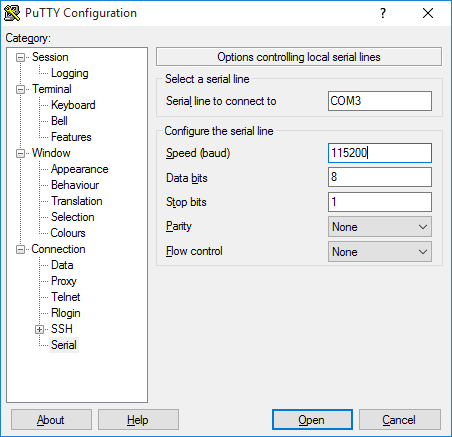
Next, connect to the ERL with the serial console of your choice. I’m using PuTTY on Windows. The settings you need are under Connection –> Serial, shown below.
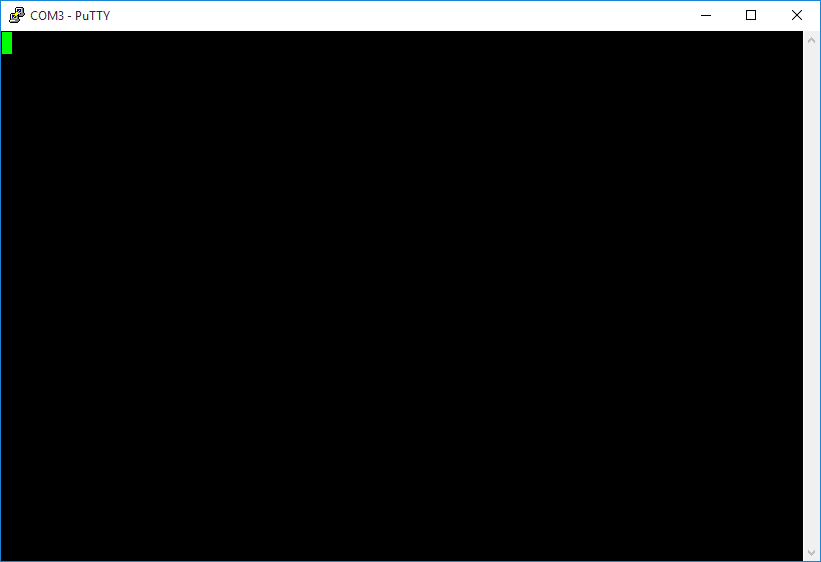
If you get a blank screen (shown below), just press Enter once to get the prompt to login.
Linux
Typically, you’ll need to add your user to a group to use the serial console. In Arch Linux, the group is uucp, but it may be different depending on your distribution.
sudo gpasswd -a username uucp
Start by plugging in your serial cable to identify which port it is connected to. My device was at /dev/ttyUSB0.
dmesg | grep -iE 'serial|tty'
Next, you’ll need to install a program to use the serial console. I’m using picocom, but you can also use minicom, screen, etc…
sudo picocom -b 115200 -d 8 -f n -p 1 -y n /dev/ttyUSB0
Again, if you get a blank screen, just press Enter once to get the prompt to login.
Hope this helps!
-Logan
