
Hey! Listen! This post is part of a series on the DeskMini H470 as a hypervisor. Check them all out!
| Date | URL | Part |
|---|---|---|
| 2022-09-07 | Adding a ZFS mirror to Proxmox | Add a ZFS mirror to Proxmox |
| 2022-09-02 | Adding data center SSDs to the DeskMini H470 | Add 2x Intel D3-S4510 to the DeskMini H470 |
| 2021-06-23 | ASRock DeskMini H470 as a compact hypervisor | Initial post about DeskMini H470 |
Introduction
Last year, I setup the ASRock DeskMini H470 as a compact hypervisor running Proxmox. During setup, I only installed a single NVMe SSD. However, I specifically chose the DeskMini H470 because it had space for more drives, which I knew I would eventually want to make use of. Today is that day.
Current configuration
The DeskMini H470 has the following storage options:
- 2x SATA 6Gb 2.5-inch 7mm/9.5mm
- 1x M.2 Socket 2280 PCIe Gen3 (my NVMe SSD is installed here)
- 1x M.2 Socket 2280 PCIe Gen4 (requires an 11th Gen Intel CPU, which I don’t have)
Currently, my only storage in the DeskMini H470 is a single Samsung 970 Pro 512GB NVMe SSD.

By default, Proxmox uses 25% of the disk for root storage, 12.5% of the disk for swap (max 8GB), then the rest for LVM storage (mainly for VMs/CTs). Below is my current partition layout. Note that backups, ISOs, and container templates are stored on a physically separate NAS, so their storage is not taken into account here.
NAME                         MAJ:MIN RM   SIZE RO TYPE MOUNTPOINT
nvme0n1                      259:0    0 476.9G  0 disk
├─nvme0n1p1                  259:1    0  1007K  0 part
├─nvme0n1p2                  259:2    0   512M  0 part /boot/efi
└─nvme0n1p3                  259:3    0 476.4G  0 part
  ├─pve-swap                 253:0    0     8G  0 lvm  [SWAP]
  ├─pve-root                 253:1    0    96G  0 lvm  /
  ├─pve-data_tmeta           253:2    0   3.6G  0 lvm
  │ └─pve-data-tpool         253:4    0 349.3G  0 lvm
  │   ├─pve-data             253:5    0 349.3G  1 lvm
  │   ├─pve-vm--105--disk--0 253:6    0     4M  0 lvm
  │   ├─pve-vm--105--disk--1 253:7    0    16G  0 lvm
  │   ├─pve-vm--100--disk--0 253:8    0    55G  0 lvm
  │   ├─pve-vm--112--disk--0 253:9    0     8G  0 lvm
  │   ├─pve-vm--101--disk--0 253:10   0     8G  0 lvm
  │   ├─pve-vm--111--disk--0 253:11   0     8G  0 lvm
  │   ├─pve-vm--113--disk--0 253:12   0     8G  0 lvm
  │   ├─pve-vm--102--disk--0 253:13   0     8G  0 lvm
  │   ├─pve-vm--106--disk--0 253:14   0    65G  0 lvm
  │   ├─pve-vm--103--disk--0 253:15   0     8G  0 lvm
  │   ├─pve-vm--104--disk--0 253:16   0     8G  0 lvm
  │   └─pve-vm--104--disk--1 253:17   0    75G  0 lvm
  └─pve-data_tdata           253:3    0 349.3G  0 lvm
    └─pve-data-tpool         253:4    0 349.3G  0 lvm
      ├─pve-data             253:5    0 349.3G  1 lvm
      ├─pve-vm--105--disk--0 253:6    0     4M  0 lvm
      ├─pve-vm--105--disk--1 253:7    0    16G  0 lvm
      ├─pve-vm--100--disk--0 253:8    0    55G  0 lvm
      ├─pve-vm--112--disk--0 253:9    0     8G  0 lvm
      ├─pve-vm--101--disk--0 253:10   0     8G  0 lvm
      ├─pve-vm--111--disk--0 253:11   0     8G  0 lvm
      ├─pve-vm--113--disk--0 253:12   0     8G  0 lvm
      ├─pve-vm--102--disk--0 253:13   0     8G  0 lvm
      ├─pve-vm--106--disk--0 253:14   0    65G  0 lvm
      ├─pve-vm--103--disk--0 253:15   0     8G  0 lvm
      ├─pve-vm--104--disk--0 253:16   0     8G  0 lvm
      └─pve-vm--104--disk--1 253:17   0    75G  0 lvm
Goals
Without having to reinstall Proxmox, the easiest way to add storage was to add 2x SATA SSDs. My goals were to:
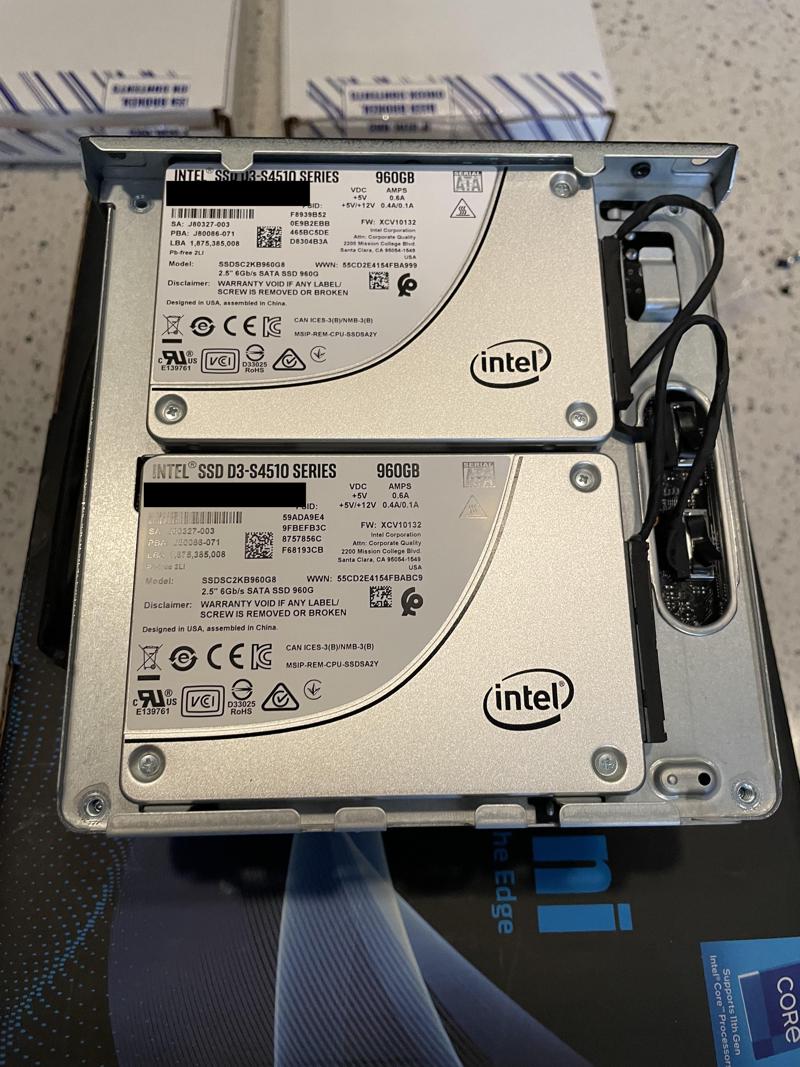
- Install two SSDs into my case
- Verify the SSDs work, firmware is up to date, etc…
- Setup a ZFS mirror of the two disks
- Move my VMs/CTs to that storage (this will leave only Proxmox on the 970 Pro)

I’ll be covering the former two steps in this post, and the latter in another.
Disks
Disk selection
I spent way too much time deciding on SSDs. I knew I wanted enterprise-grade SSDs, which have power-loss protection and are generally rated for more writes than consumer SSDs. However, enterprise-grade SSDs are hard to find new on sale to the general public. Although I did look on eBay, I wanted the warranty that came with a new drive. Below were my options (for comparision, I added the 970 Pro to the list).
| Make | Model | Year introduced | NAND type | IOPS (4K read) | IOPS (4K write) | Mean Time Between Failures (MTBF) | Endurance Rating (Lifetime Writes) | Price |
|---|---|---|---|---|---|---|---|---|
| Intel | D3-S4510 960GB | Q3'18 | 64-layer TLC 3D NAND | 95k | 36k | 2 million hours | 3.5 PBW | $265 @ Newegg, $261 @ B&H |
| Intel | D3-S4610 960GB | Q3'18 | 64-layer TLC 3D NAND | 96k | 51k | 2 million hours | 5.8 PBW | $351 @ Insight |
| Intel | D3-S4520 960GB | Q3'21 | 144-layer TLC 3D NAND | 90k | 43k | 2 million hours | 5.3 PBW | $285 @ Insight |
| Samsung | PM893 960GB | Q1'21 | 128-layer TLC V-NAND | 98k | 30k | 2 million hours | 1.752 PBW | $171 @ SuperMicro, $218 @ CDW |
| Samsung | 970 Pro 512GB | Q3'18 | 64-layer MLC V-NAND | 370k | 500k | 1.5 million hours | 0.6 PBW | $149 (at time of purchase in 2021) |
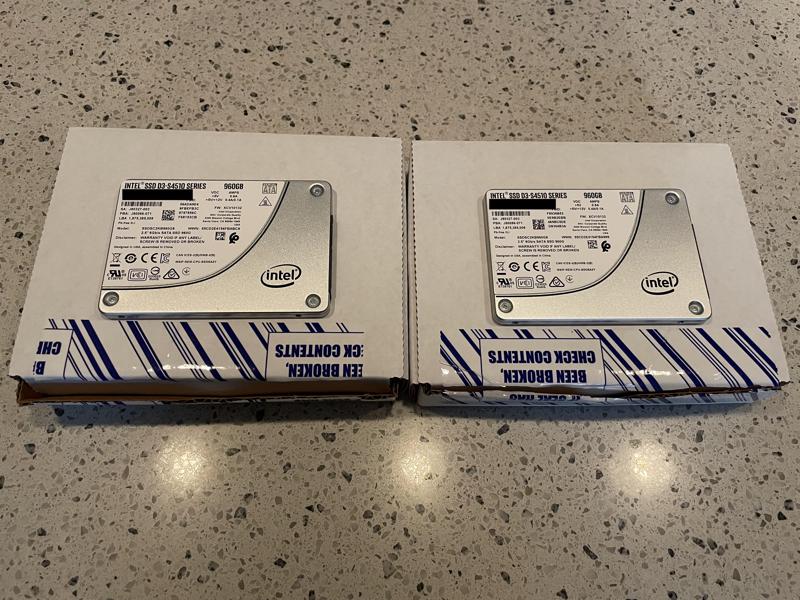
In the end, I ended up choosing the Intel D3-S4510 960GB, as it came recommended on multiple forums. I would have preferred the D3-S4610 960GB (since it’s more write-intensive), but I wasn’t 100% sure if Insight was selling new drives or not (conflicting reports on Reddit).
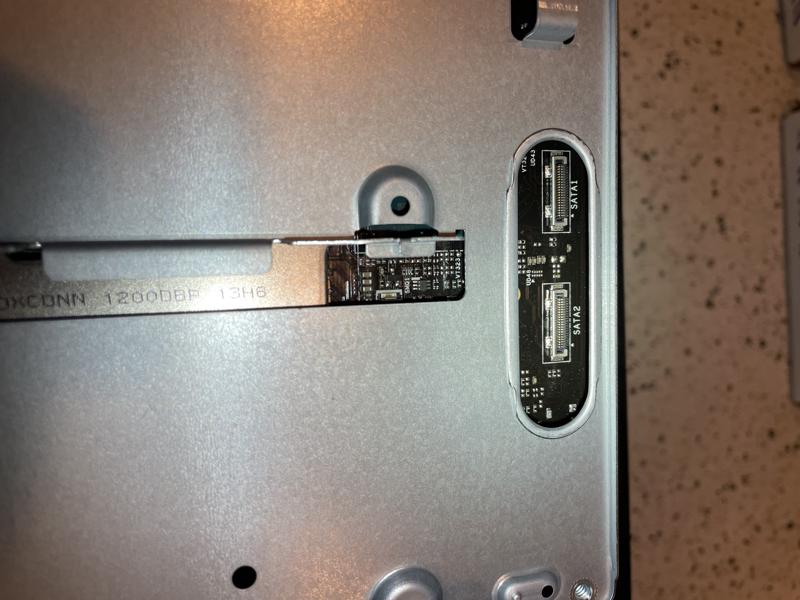
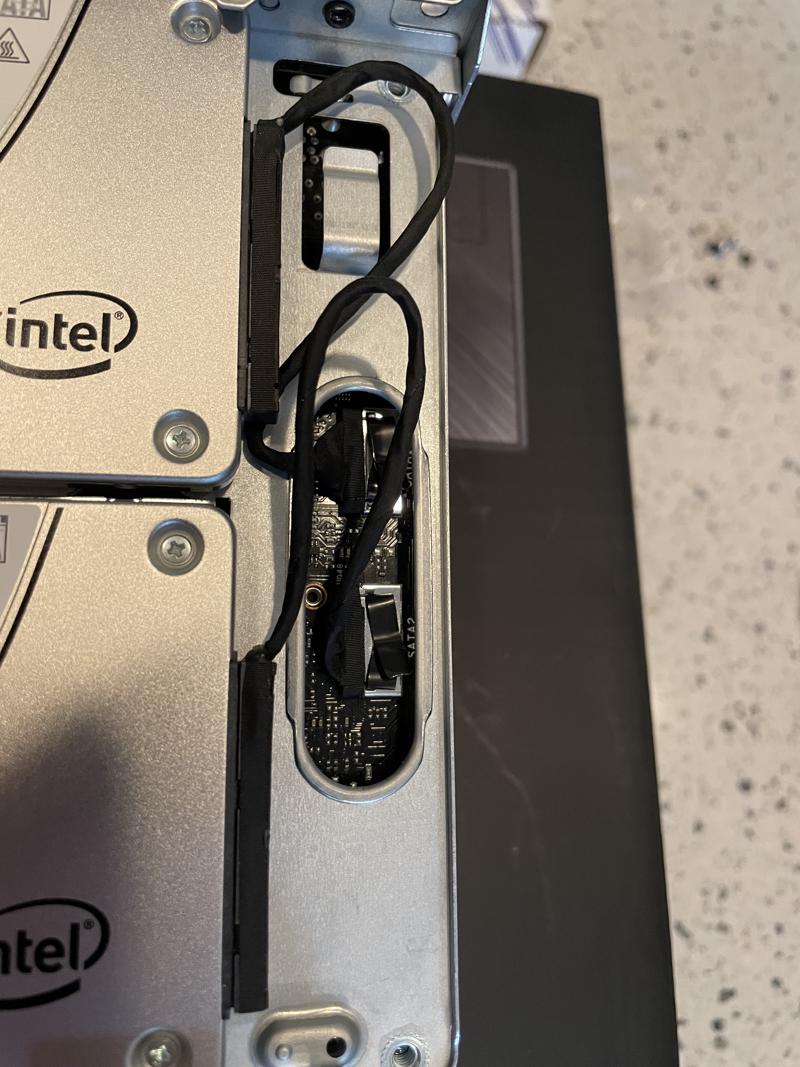
Physical installation
The physical installation was easy enough, although I did need to remove the motherboard from the tray to access the screws. Also, ASRock uses a propriety SATA cable for these ultra-tiny connectors.
Identify disks
The basic smoke test was to make sure the disks worked and showed up to the kernel.
ls -la /dev/disk/by-id/ | grep sd
I ran lshw -class disk, but you could also use hwinfo --disk to see similiar info. We’re looking for the sectorsize, which will be important later when we setup ZFS.
root@proxmox02:~# lshw -class disk
  *-disk:0
       description: ATA Disk
       product: INTEL SSDSC2KB96
       physical id: 0
       bus info: scsi@2:0.0.0
       logical name: /dev/sda
       version: 0132
       serial: XXXXXXXXXXXXXXXXXX
       size: 894GiB (960GB)
       configuration: ansiversion=5 logicalsectorsize=512 sectorsize=4096
  *-disk:1
       description: ATA Disk
       product: INTEL SSDSC2KB96
       physical id: 1
       bus info: scsi@3:0.0.0
       logical name: /dev/sdb
       version: 0132
       serial: XXXXXXXXXXXXXXXXXX
       size: 894GiB (960GB)
       configuration: ansiversion=5 logicalsectorsize=512 sectorsize=4096
Firmware
In 2018, Intel identified a bug in the 1.92TB and 3.84TB models that caused the SSDs to “hang” after 1700 hours of power-on time. Even though my drives were not affected, I wanted to make sure the firmware was up-to-date.
LVFS
I tried using LVFS, but Intel/Solidigm don’t seem to be contributing a ton of firmware files (compared to vendors like Dell and Lenovo).
sudo apt -y install fwupd
fwupdmgr get-devices
fwupdmgr get-updates
I kept receiving this.
No updatable devices
Solidigm Storage Tool
Intel sold their NAND flash business to SK Hynix (under the name Solidigm) in November 2020, so I used the Solidigm Storage Tool to update the firmware.
I followed this guide to install the tool and this guide to use it. The firmware is built into the tool, so there are no external downloads.
I started by identifying my SSDs (my 970 Pro was SSD 0 in this case).
sst show -ssd
sst show -ssd 1
sst show -ssd 2
From the output above, I was able to see the firmware on each device was out of date.
Firmware : XCV10132
FirmwareUpdateAvailable : XCV10140
I checked a few sensors and SMART data to make sure the drives were healthy.
sst show -sensor -ssd 1
sst show -sensor -ssd 2
sst show -smart -ssd 1
sst show -smart -ssd 2
Then, I finally updated the firmware.
sst load -ssd 1
Once successful, I saw the message below, repeated with the second drive, then rebooted.
Status : Firmware updated successfully. Please reboot the system.
Now, checking the status, I could see the firmware was up-to-date.
Firmware : XCV10140
FirmwareUpdateAvailable : The selected drive contains current firmware as of this tool release.
I also kicked off SMART tests to double-check the drives.
sudo smartctl -t long /dev/sda
sudo smartctl -t long /dev/sdb
Conclusion
That’s it for now. Below is my new current configuration (see the two drives at the top). In my next post, I’ll be setting up a ZFS pool and moving my VMs/CTs to that storage.
NAME                         MAJ:MIN RM   SIZE RO TYPE MOUNTPOINT
sda                            8:0    0 894.3G  0 disk
sdb                            8:16   0 894.3G  0 disk
nvme0n1                      259:0    0 476.9G  0 disk
├─nvme0n1p1                  259:1    0  1007K  0 part
├─nvme0n1p2                  259:2    0   512M  0 part /boot/efi
└─nvme0n1p3                  259:3    0 476.4G  0 part
  ├─pve-swap                 253:0    0     8G  0 lvm  [SWAP]
  ├─pve-root                 253:1    0    96G  0 lvm  /
  ├─pve-data_tmeta           253:2    0   3.6G  0 lvm
  │ └─pve-data-tpool         253:4    0 349.3G  0 lvm
  │   ├─pve-data             253:5    0 349.3G  1 lvm
  │   ├─pve-vm--105--disk--0 253:6    0     4M  0 lvm
  │   ├─pve-vm--105--disk--1 253:7    0    16G  0 lvm
  │   ├─pve-vm--100--disk--0 253:8    0    55G  0 lvm
  │   ├─pve-vm--112--disk--0 253:9    0     8G  0 lvm
  │   ├─pve-vm--101--disk--0 253:10   0     8G  0 lvm
  │   ├─pve-vm--111--disk--0 253:11   0     8G  0 lvm
  │   ├─pve-vm--113--disk--0 253:12   0     8G  0 lvm
  │   ├─pve-vm--102--disk--0 253:13   0     8G  0 lvm
  │   ├─pve-vm--106--disk--0 253:14   0    65G  0 lvm
  │   ├─pve-vm--103--disk--0 253:15   0     8G  0 lvm
  │   └─pve-vm--104--disk--0 253:16   0     8G  0 lvm
  └─pve-data_tdata           253:3    0 349.3G  0 lvm
    └─pve-data-tpool         253:4    0 349.3G  0 lvm
      ├─pve-data             253:5    0 349.3G  1 lvm
      ├─pve-vm--105--disk--0 253:6    0     4M  0 lvm
      ├─pve-vm--105--disk--1 253:7    0    16G  0 lvm
      ├─pve-vm--100--disk--0 253:8    0    55G  0 lvm
      ├─pve-vm--112--disk--0 253:9    0     8G  0 lvm
      ├─pve-vm--101--disk--0 253:10   0     8G  0 lvm
      ├─pve-vm--111--disk--0 253:11   0     8G  0 lvm
      ├─pve-vm--113--disk--0 253:12   0     8G  0 lvm
      ├─pve-vm--102--disk--0 253:13   0     8G  0 lvm
      ├─pve-vm--106--disk--0 253:14   0    65G  0 lvm
      ├─pve-vm--103--disk--0 253:15   0     8G  0 lvm
      └─pve-vm--104--disk--0 253:16   0     8G  0 lvm
-Logan
