
Hey! Listen! This post is part of a series on pfSense. Check them all out!
| Date | URL | Part |
|---|---|---|
| 2025-03-01 | pfSense on the OPNsense DEC740 | Migrated to the OPNsense DEC740 |
| 2019-08-25 | pfSense on the PC Engines APU2 | Migrated to a PC Engines APU2D4 |
| 2019-07-17 | My SG-1100 died | Migrated back the the EdgeRouter Lite |
| 2019-06-28 | Migrating away from the Ubiquiti EdgeRouter Lite | Migrated to a Netgate SG-1100 |
Introduction
In the past few weeks, I replaced my EdgeRouter Lite with a Netgate SG-1100. Two weeks later, my SG-1100 died, and I had to put the EdgeRouter Lite back. However, I still wanted to replace the ERL with a pfSense device (albeit, not Netgate hardware).
PC Engines APU2
Again, my requirements for hardware were as follows:
- Hardware that is small, low power, and fanless (this device is in my living room, not a server rack)
- Have Intel NICs (they generally have better compatibility with Linux/BSD than Realtek)
- Be around $250 or less, including RAM (but not storage)
Going back to my hardware chart, I further narrowed it down to the PC Engines APU2 and the Shuttle DS77U (in fact, the DS10U was just released, which is a DS77U with an 8th Gen Intel processor). While the Shuttle DS77U/DS10U would have better hardware (newer CPU, DDR4 instead of DDR3, etc…), I chose to go with the APU2. The APU2 comes highly recommended on reddit and the pfSense forums, and it receives frequent BIOS updates (including Coreboot support, and most recently AMD Core Performance Boost).
There are four main differentiators of the APU2 lineup (thanks to commenter Cee Jay for clearing this up):
- the APU platform generation (e.g., 2, 3, 4, etc…) - this is where you get APU2, APU3, APU4, etc…
- the board revision (e.g., a, b, c, d, etc…) - this is where you get APU2A, APU2B, APU2C, etc…
- the amount of RAM (2GB or 4GB) - this is where you get APU2D2, APU2D4, etc…
- the type of NIC (Intel i210AT vs i211AT)
When purchasing an APU model, do not assume that a bigger model number is better. For example, the APU4 is not “better” than the APU2 because the model number is larger. You should always do your research to determine what model you need for your application.
For networking applications, it’s generally known that the i210AT is considered “better” than the i211AT because it has four transmit and four receive queues per port, while the i211AT only has two transmit and two receive queues per port. So when purchasing an APU, I made sure to look for one with an i210AT.
I ended up purchasing the following items directly from PC Engines directly. Shipping took a total of 10 days from Switzerland to Pennsylvania. It arrived via USPS and required a signature, since it originated outside the United States.
- apu2d4 - $120 (this has the i210AT)
- case1d2blku - $10
- ac12vus2 - $4.40
- Samsung 860 EVO 250GB mSATA SSD - $67.90
- usbcom1a - $8.00 (optional - the drivers for Windows 10 are here)
- apufix1a - $5.00 (optional - this makes positioning the thermal pad much easier)
- hexbit - $3.50 (optional)
Pre-install
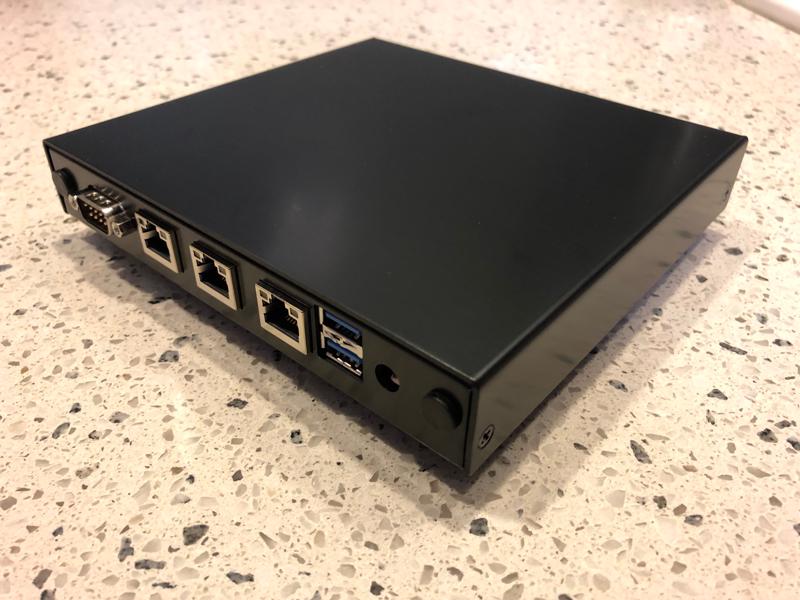
Assembly
I chose to assemble my APU2 myself, but there is an option to pay to have it assembled. If you choose to assemble it yourself, there is a really good video here. Pro-tip, make sure you remove the screws on the serial connection before you try to assemble anything.
Connect to serial
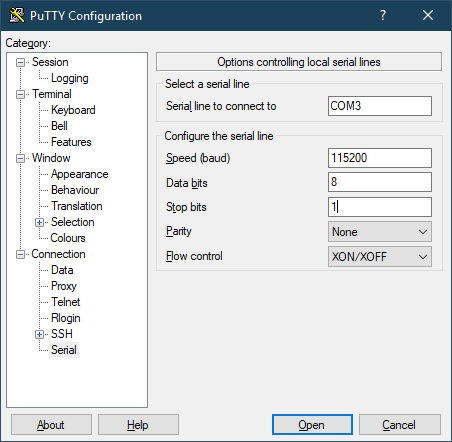
Connect the serial cable using the settings from the manual. These are the same settings that pfSense uses as well.
- Speed: 115200
- Data Bits: 8
- Parity Bits: None
- Stop Bits: 1
These are the PuTTY settings I used (your COM port may be different).
Press F10 at boot when connected via the console cable and you will see the boot menu.

Memtest86
I always test my memory before I use it, and I always recommend Memtest86 (not to be confused with Memtest86+, which is no longer maintained). There is a build of Memtest86 built-in to the APU2 BIOS, just press F10 at boot when connected via the console cable and you can run a memory test with option 3.

Setup
Install
Installing pfSense was easy enough, especially if you’re using the amazing install guide (seriously, use it). For my install, I chose the options below from the download page. The APU2 does not have a VGA port, so you don’t have any option other than to do an install over serial.

Configuration
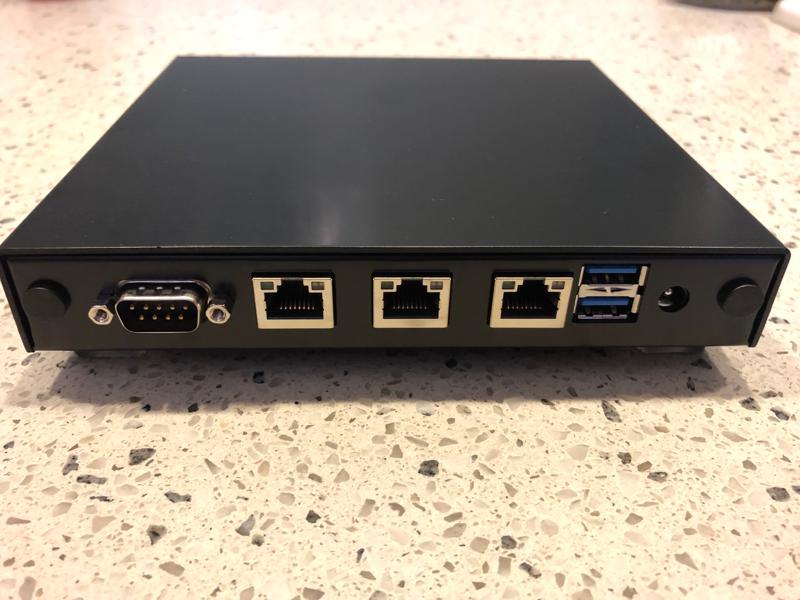
The initial configuration was easy. The middle port is the LAN port, which will give you a 192.168.1.1/24 address. From a browser, follow the prompts to do your initial setup. I won’t detail exactly what I did to my setup, since everyone’s install will be different.
I recommend getting a cheap label maker and labeling the interfaces, since they are not marked on the case anywhere. I also make a label for the boot menu shortcut key and the serial settings.
BIOS update
This is personal preference, but I always try to update the BIOS on my devices. With the recent Meltdown and Spectre vulnerabilities, it is crucial to keep your BIOS updated (since these vulnerabilities can only be mitigated with firmware updates). For the APU2, the BIOS updates are located here.
PC Engines recommends you flash the firmware from a separate Linux-based USB drive, but you can do it from inside pfSense, after pfSense is installed, as shown here.
Speedtest
Here are the iPerf results when running a test with my ERL as the router. Keep in mind, my internet at home is only 400/400, so that’s my current maximum speed.
Connecting to host loganmarchione.com, port 5201
[ 4] local 10.10.2.34 port 55818 connected to 68.183.148.132 port 5201
[ ID] Interval Transfer Bandwidth Retr Cwnd
[ 4] 0.00-1.00 sec 48.0 MBytes 402 Mbits/sec 28 1.62 MBytes
[ 4] 1.00-2.00 sec 64.8 MBytes 543 Mbits/sec 23 1.35 MBytes
[ 4] 2.00-3.00 sec 67.2 MBytes 564 Mbits/sec 0 1.42 MBytes
[ 4] 3.00-4.00 sec 67.2 MBytes 564 Mbits/sec 0 1.47 MBytes
[ 4] 4.00-5.00 sec 67.2 MBytes 564 Mbits/sec 0 1.50 MBytes
[ 4] 5.00-6.00 sec 67.2 MBytes 564 Mbits/sec 0 1.52 MBytes
[ 4] 6.00-7.00 sec 66.4 MBytes 557 Mbits/sec 0 1.53 MBytes
[ 4] 7.00-8.00 sec 66.6 MBytes 559 Mbits/sec 0 1.54 MBytes
[ 4] 8.00-9.00 sec 67.2 MBytes 564 Mbits/sec 0 1.54 MBytes
[ 4] 9.00-10.00 sec 67.2 MBytes 564 Mbits/sec 0 1.56 MBytes
- - - - - - - - - - - - - - - - - - - - - - - - -
[ ID] Interval Transfer Bandwidth Retr
[ 4] 0.00-10.00 sec 649 MBytes 544 Mbits/sec 51 sender
[ 4] 0.00-10.00 sec 647 MBytes 542 Mbits/sec receiver
And here are the results of same test, but with the APU2 acting as the router. As you can see, it’s able to max out my connection without breaking a sweat.
Connecting to host loganmarchione.com, port 5201
[ 4] local 10.10.2.34 port 51548 connected to 68.183.148.132 port 5201
[ ID] Interval Transfer Bandwidth Retr Cwnd
[ 4] 0.00-1.00 sec 53.7 MBytes 450 Mbits/sec 9 2.21 MBytes
[ 4] 1.00-2.00 sec 67.2 MBytes 563 Mbits/sec 1 2.23 MBytes
[ 4] 2.00-3.00 sec 67.2 MBytes 564 Mbits/sec 0 2.25 MBytes
[ 4] 3.00-4.00 sec 67.2 MBytes 564 Mbits/sec 0 2.27 MBytes
[ 4] 4.00-5.00 sec 67.2 MBytes 563 Mbits/sec 0 2.29 MBytes
[ 4] 5.00-6.00 sec 67.2 MBytes 564 Mbits/sec 0 2.32 MBytes
[ 4] 6.00-7.00 sec 67.2 MBytes 563 Mbits/sec 0 2.34 MBytes
[ 4] 7.00-8.00 sec 67.2 MBytes 564 Mbits/sec 0 2.38 MBytes
[ 4] 8.00-9.00 sec 67.1 MBytes 563 Mbits/sec 0 2.47 MBytes
[ 4] 9.00-10.00 sec 67.2 MBytes 564 Mbits/sec 1 2.51 MBytes
- - - - - - - - - - - - - - - - - - - - - - - - -
[ ID] Interval Transfer Bandwidth Retr
[ 4] 0.00-10.00 sec 658 MBytes 552 Mbits/sec 11 sender
[ 4] 0.00-10.00 sec 657 MBytes 551 Mbits/sec receiver
I have heard nothing but good things about the APU2, and am so far impressed!
-Logan
