Introduction

I know I’m about five years too late too the party, but I’m finally getting around to setting up Proxmox Backup Server (PBS).

Right now, I have 10 servers inside my Proxmox Virtual Environment (PVE) setup, made up of a mix of virtual machines (VMs) and LXC containers (LXCs). I’m currently using the built-in PVE backup system to backup my VMs/LXCs to my NAS. This results in about 250GB of backups, which happen once a week. I keep 12 weeks of backups, so that’s 3TB of backups on my NAS. Even if nothing changes week-to-week on a single VM/LXC, the entire machine is getting backed up every week, taking up the full amount of space.

PBS is a backup solution from the makers of PVE that has a ton of features:

  • designed specifically to work with PVE
  • open-source
  • written in Rust (so it’s fast and memory safe)
  • free (as in freedom and beer), though they do have a paid support plan (but I’m unsure why it’s so much more expensive than the PVE support plan)
  • incremental backups
  • deduplication
  • compression
  • encryption
  • checksums
  • granular restores (e.g., single files from a machine)

The big selling points here are incremental backups and deduplication. Incremental, meaning that there is a single, large, initial backup for each machine, and then each subsequent backup only backs up the changed files. Deduplication, meaning that files that are the same across backups are only stored once. Both of these combined can save you a ton of space on backups. I’ve read online that the deduplication ratio can be as high as 50:1 or 100:1.

Hardware

You can install PBS on a VM running inside PVE, or even on the same host as PVE (it uses a different port), but you can run into some unique failure modes doing this. It’s much easier to run PBS on a separate piece of hardware. With that said, I was looking for the following things in a PBS box:

  • small (needs to fit in my mini-rack)
  • x86 (to run PBS)
  • DDR4/DDR5 memory (ECC if possible)
  • fanless (one less thing to dust)
  • Intel NICs
  • M.2 storage

It’s easy to find all of that in cheap Chinese mini PCs on Amazon, except ECC support. Error correcting code (ECC) memory is special memory that has an extra chip on the RAM stick that is used for parity bits to detect and correct bit-flips in memory. It’s generally used on servers, and hardly ever used on consumer PCs (especially mini PCs). I was also trying to find something that was from a relatively well-known manufacturer that wouldn’t burn my house down. The Chinese mini PCs worry me, because they’re all no-name brands that disappear from Amazon after a few months (or provide no support if they don’t disappear).

Comparison

I must have looked at hundreds or thousands of mini PCs on obscure industrial and electronics distributor websites. Below are the devices that I found in my searching.

Make/Model Specific model number CPU RAM ECC Storage NICs Price (main unit only) Comments
ASRock iBOX-250J N/A Intel J6412 (4c/4t, 10W) 2x DDR4-3200 SO-DIMM slots (max 32GB) No 1x M.2 2280 NVMe PCIe Gen3 x1, 1x 2.5" bay 2x Intel i225V Seems impossible to buy as an individual
ASRock iBOX-260J N/A Intel N97 (4c/4t, 12W) 1x DDR4-3200 SO-DIMM slot (max 32GB) No 1x M.2 2280 NVMe PCIe Gen3 x1, 1x 2.5" bay 1x Intel i210AT, 1x Intel i226V Seems impossible to buy as an individual
Shuttle DL30N N/A Intel N100/N200/N300 1x DDR5-4800 SO-DIMM slot (max 16GB) No 1x M.2 2280 NVMe PCIe Gen3 x2, 1x 2.5" bay 2x Intel i226LM ~$500
Jetway FBU03 HBFBU03-6412-B Intel J6412 (4c/4t, 10W) 1x DDR4-3200 SO-DIMM slot (max 32GB) No 1x M.2 2280 NVMe PCIe Gen3 x2 2x Intel i225V ~$299
Jetway BFTADN1 BFTADN1-N97-N Intel N97 (4c/4t, 12W) 1x DDR5-4800 SO-DIMM slot (max 32GB) No 1x M.2 2280 NVMe PCIe Gen3 x2 2x Intel i225V ~$550
GIGAIPC QBiX-EHLA6412-A1 N/A Intel J6412 (4c/4t, 10W) 1x DDR4-3200 SO-DIMM slot (max 32GB) No 1x M.2 2280 NVMe PCIe Gen3 x2 1x Intel i211AT ~$300
GIGAIPC QBiX-ADNAN97-A1 N/A Intel N97 (4c/4t, 12W) 1x DDR5-4800 SO-DIMM slot (max 16GB) No 1x M.2 2280 NVMe PCIe Gen3 x1 2x Realtek RTL8111H 👎 ~$350 So close, but Realtek NICs
SuperMicro SYS-E100-14AM-E N/A Intel x7433RE (4c/4t, 9W) 1x DDR5-4800 SO-DIMM slot (max 16GB) No 1x M.2 2280 NVMe PCIe Gen3 x1 2x Intel i226IT ~$500
SuperMicro SYS-E100-14AM-H N/A Intel x7835RE (8c/8t, 12W) 1x DDR5-4800 SO-DIMM slot (max 16GB) No 1x M.2 2280 NVMe PCIe Gen3 x1 2x Intel i226IT ~$500
SuperMicro SYS-E100-14AM-L N/A Intel N97 (4c/4t, 12W) 1x DDR5-4800 SO-DIMM slot (max 16GB) No 1x M.2 2280 NVMe PCIe Gen3 x1 2x Intel i226IT ~$500

Purchase

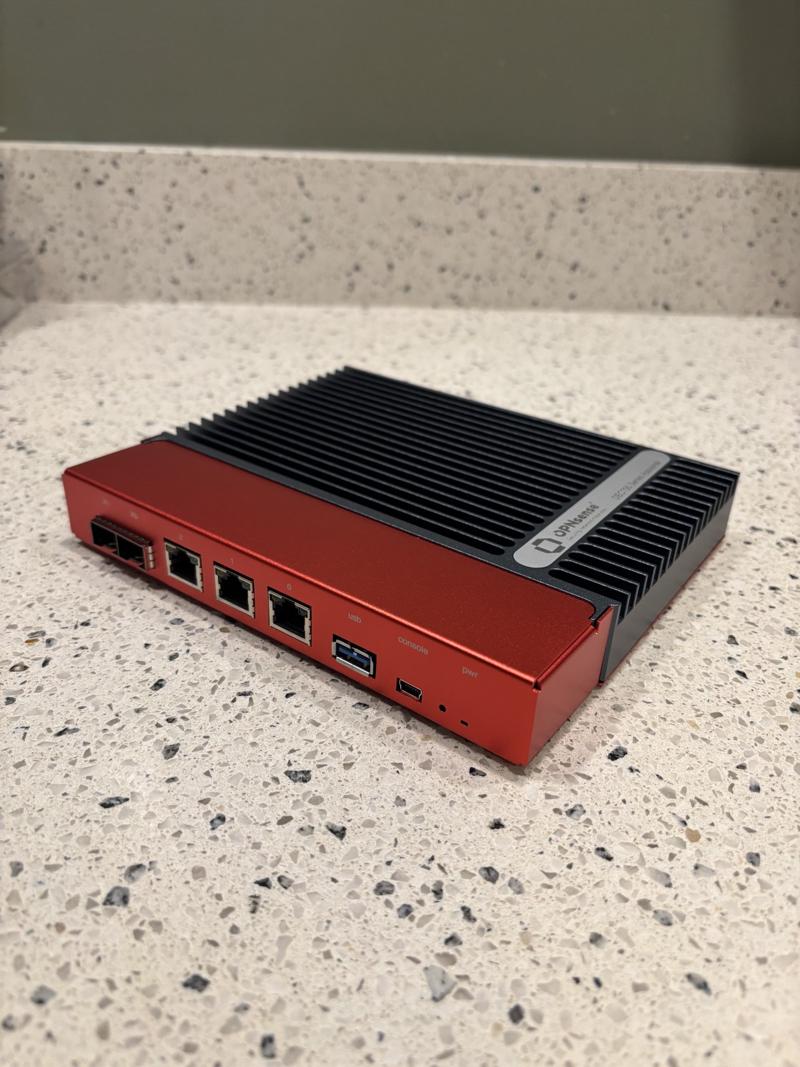
In the end, I really wanted ECC memory, so I once again found myself purchasing another OPNsense DEC740 (the last one was for my pfSense router). I would love to find out who the OEM is for these so that I could purchase five of them (without OPNsense installed). I really love these little boxes, I just wish they weren’t so expensive 😅.

dec740

I also picked up two upgrades:

  • a stick of 16GB DDR4 ECC UDIMM VLP (specifically model number MTA18ADF2G72AZ-2G6 from Memory.net) for $84
  • an industrial-grade 2TB NVMe SSD (specifically model number OM8SGP42048K2-A00 from Mouser.com) for $229

You can see my post here on what the inside of the DEC740 looks like, so I won’t re-post those pictures here.

Pre-installation

Console settings

The serial adapter shows up as Exar Corp. XR21B1411 UART in Linux, and I verifed it connected to /dev/ttyUSB0 to by using sudo dmesg | grep tty. I tried to use screen to connect to it, but after a while, the characters on the screen would get misaligned and impossible to read.

screen /dev/ttyUSB0 115200

I ended up using tio, which worked great.

tio /dev/ttyUSB0

This was the BIOS that shipped with the DEC740. According to this page, it’s up-to-date.

BIOS Version : 05.38.26.0025-A10.33
BIOS Build Date : 03/05/2025
Processor Type : AMD Ryzen Embedded V1500B
System Memory Speed : 2400 MHz

At boot, you can press ESC once to enter the BIOS “Front Page” (you need to be very quick with this first ESC).

                                                           Front Page
  Front Page
/-------------------------------------------------------------------------------------+----------------------------------------\
|Continue                                                                             |This selection will direct the system   |
|>Boot Manager                                                                        |to continue to booting process          |
|>Device Management                                                                   |                                        |
|>Boot From File                                                                      |                                        |
|>Administer Secure Boot                                                              |                                        |
|>Setup Utility                                                                       |                                        |
|                                                                                     |                                        |
|                                                                                     |                                        |
|                                                                                     |                                        |
|                                                                                     |                                        |
|                                                                                     |                                        |
|                                                                                     |                                        |
|                                                                                     |                                        |
|                                                                                     |                                        |
|                                                                                     |                                        |
|                                                                                     |                                        |
|                                                                                     |                                        |
|                                                                                     |                                        |
|                                                                                     |                                        |
|                                                                                     |                                        |
|                                                                                     |                                        |
|                                                                                     |                                        |
|                                                                                     |                                        |
|                                                                                     |                                        |
|                                                                                     |                                        |
|                                                                                     |                                        |
|                                                                                     |                                        |
|                                                                                     |                                        |
|                                                                                     |                                        |
|                                                                                     |                                        |
|                                                                                     |                                        |
|                                                                                     |                                        |
|                                                                                     |                                        |
|                                                                                     |                                        |
\-------------------------------------------------------------------------------------+----------------------------------------/
 F1  Help                                                       Enter Select > SubMenu
 ^/v Select Item

BIOS settings

Enable ECC

At the Front Page, go to Setup Utility, then AMD CBS, then UMC Common Options, then DDR4 Common Options, then Common RAS, then ECC Configuration. Then, set the DRAM ECC Enable to Enabled.

                                                    InsydeH2O Setup Utility                                             Rev. 5.0
                                                  AMD CBS
/-------------------------------------------------------------------------------------+----------------------------------------\
|ECC Configuration                                                                    |Use this option to enable / disable     |
|                                                                                     |DRAM ECC. Auto will set ECC to enable.  |
|DRAM ECC Symbol Size                       <x8>                                      |                                        |
|DRAM ECC Enable                            <Auto>                                    |                                        |
|                                                                                     |                                        |
|                                                                                     |                                        |
|                                                                                     |                                        |
|                                                                                     |                                        |
|                                                                                     |                                        |
|                                                                                     |                                        |
|                                                                                     |                                        |
|                                                                                     |                                        |
|                                                                                     |                                        |
|                                                      /---------------\              |                                        |
|                                                      |DRAM ECC Enable|              |                                        |
|                                                      |---------------|              |                                        |
|                                                      |Disabled       |              |                                        |
|                                                      |Enabled        |              |                                        |
|                                                      |Auto           |              |                                        |
|                                                      \---------------/              |                                        |
|                                                                                     |                                        |
|                                                                                     |                                        |
|                                                                                     |                                        |
|                                                                                     |                                        |
|                                                                                     |                                        |
|                                                                                     |                                        |
|                                                                                     |                                        |
|                                                                                     |                                        |
|                                                                                     |                                        |
|                                                                                     |                                        |
|                                                                                     |                                        |
|                                                                                     |                                        |
|                                                                                     |                                        |
|                                                                                     |                                        |
\-------------------------------------------------------------------------------------+----------------------------------------/
 F1  Help                       ^/v Select Item                F5/F6 Change Values            F9  Setup Defaults
 Esc Exit                       </> Select Item                Enter Select > SubMenu         F10 Save and Exit

ECC error injection

At the Front Page, go to Setup Utility, then AMD CBS, then UMC Common Options, then DDR4 Common Options, then Common RAS. Then, set the Disable Memory Error Injection to False (since we want to test ECC memory errors).

                                                    InsydeH2O Setup Utility                                             Rev. 5.0
                                                  AMD CBS
/-------------------------------------------------------------------------------------+----------------------------------------\
|Common RAS                                                                           |True: UMC::CH::MiscCfg[DisErrInj]=1     |
|                                                                                     |                                        |
|Data Poisoning                             <Disabled>                                |                                        |
|>ECC Configuration                                                                   |                                        |
|Disable Memory Error Injection             <True>                                    |                                        |
|                                                                                     |                                        |
|                                                                                     |                                        |
|                                                                                     |                                        |
|                                                                                     |                                        |
|                                                                                     |                                        |
|                                                                                     |                                        |
|                                                                                     |                                        |
|                                                                                     |                                        |
|                                                                                     |                                        |
|                                               /------------------------------\      |                                        |
|                                               |Disable Memory Error Injection|      |                                        |
|                                               |------------------------------|      |                                        |
|                                               |False                         |      |                                        |
|                                               |True                          |      |                                        |
|                                               \------------------------------/      |                                        |
|                                                                                     |                                        |
|                                                                                     |                                        |
|                                                                                     |                                        |
|                                                                                     |                                        |
|                                                                                     |                                        |
|                                                                                     |                                        |
|                                                                                     |                                        |
|                                                                                     |                                        |
|                                                                                     |                                        |
|                                                                                     |                                        |
|                                                                                     |                                        |
|                                                                                     |                                        |
|                                                                                     |                                        |
|                                                                                     |                                        |
\-------------------------------------------------------------------------------------+----------------------------------------/
 F1  Help                       ^/v Select Item                F5/F6 Change Values            F9  Setup Defaults
 Esc Exit                       </> Select Item                Enter Select > SubMenu         F10 Save and Exit

Console/serial settings

These settings are required to get Linux to boot. If you want to go back to OPNsense at some point, you’ll probably need to change these back.

At the Front Page, go to Setup Utility, then AMD CBS, then FCH Common Options, then Uart Configuration Options. Then, set the Uart 0 Legacy Options to COM1 0x3F8.

                                                    InsydeH2O Setup Utility                                             Rev. 5.0
                                                  AMD CBS
/-------------------------------------------------------------------------------------+----------------------------------------\
|Uart Configuration Options                                                           |No help string                          |
|                                                                                     |                                        |
|Uart 0 Enable                              <Enabled>                                 |                                        |
|Uart 0 Legacy Options                      <Disabled>                                |                                        |
|Uart Driver Type                           <AMD UART Driver>                         |                                        |
|                                                                                     |                                        |
|                                                                                     |                                        |
|                                                                                     |                                        |
|                                                                                     |                                        |
|                                                                                     |                                        |
|                                                                                     |                                        |
|                                                                                     |                                        |
|                                                   /---------------------\           |                                        |
|                                                   |Uart 0 Legacy Options|           |                                        |
|                                                   |---------------------|           |                                        |
|                                                   |Disabled             |           |                                        |
|                                                   |COM1 0x3F8           |           |                                        |
|                                                   |COM2 0x2F8           |           |                                        |
|                                                   |COM3 0x3E8           |           |                                        |
|                                                   |COM4 0x2E8           |           |                                        |
|                                                   |Auto                 |           |                                        |
|                                                   \---------------------/           |                                        |
|                                                                                     |                                        |
|                                                                                     |                                        |
|                                                                                     |                                        |
|                                                                                     |                                        |
|                                                                                     |                                        |
|                                                                                     |                                        |
|                                                                                     |                                        |
|                                                                                     |                                        |
|                                                                                     |                                        |
|                                                                                     |                                        |
|                                                                                     |                                        |
|                                                                                     |                                        |
\-------------------------------------------------------------------------------------+----------------------------------------/
 F1  Help                       ^/v Select Item                F5/F6 Change Values            F9  Setup Defaults
 Esc Exit                       </> Select Item                Enter Select > SubMenu         F10 Save and Exit

On the same screen, set Uart Driver Type to AMD Serial Driver.

                                                    InsydeH2O Setup Utility                                             Rev. 5.0
                                                  AMD CBS
/-------------------------------------------------------------------------------------+----------------------------------------\
|Uart Configuration Options                                                           |Select UART driver.                     |
|                                                                                     |AMD UART Driver (HID AMDI0020)          |
|Uart 0 Enable                              <Enabled>                                 |AMD Serial Driver (HID AMDI0021)        |
|Uart 0 Legacy Options                      <COM1 0x3F8>                              |                                        |
|Uart Driver Type                           <AMD UART Driver>                         |                                        |
|                                                                                     |                                        |
|                                                                                     |                                        |
|                                                                                     |                                        |
|                                                                                     |                                        |
|                                                                                     |                                        |
|                                                                                     |                                        |
|                                                                                     |                                        |
|                                                                                     |                                        |
|                                                                                     |                                        |
|                                                     /-----------------\             |                                        |
|                                                     |Uart Driver Type |             |                                        |
|                                                     |-----------------|             |                                        |
|                                                     |AMD UART Driver  |             |                                        |
|                                                     |AMD Serial Driver|             |                                        |
|                                                     \-----------------/             |                                        |
|                                                                                     |                                        |
|                                                                                     |                                        |
|                                                                                     |                                        |
|                                                                                     |                                        |
|                                                                                     |                                        |
|                                                                                     |                                        |
|                                                                                     |                                        |
|                                                                                     |                                        |
|                                                                                     |                                        |
|                                                                                     |                                        |
|                                                                                     |                                        |
|                                                                                     |                                        |
|                                                                                     |                                        |
|                                                                                     |                                        |
\-------------------------------------------------------------------------------------+----------------------------------------/
 F1  Help                       ^/v Select Item                F5/F6 Change Values            F9  Setup Defaults
 Esc Exit                       </> Select Item                Enter Select > SubMenu         F10 Save and Exit

Memory test

I always test my memory, but since this was ECC memory, I needed a program to test the ECC functionality. Apparently, MemTest86+ (the open-source tool), doesn’t support testing ECC yet. MemTest86 Pro (the closed-source tool) does support ECC injection, so that’s what I went with.

For reference, here is the MemTest86 Pro configuration file called mt86.cfg that I was using.

ECCPOLL=1
ECCINJECT=1
LANG=en-US
AUTOMODE=1
AUTOREPORT=1
AUTOREPORTFMT=HTML
EXITMODE=0
CONSOLEONLY=1

At the Front Page, go to Boot Manager. I was able to boot from a USB flash drive containing MemTest86 Pro and it started the test right away.

/------------------------------------------------------------------------------------------------------------------------------\
|                                                         Boot Manager                                                         |
\------------------------------------------------------------------------------------------------------------------------------/


  Boot Option Menu

  EFI Boot Devices
  EFI USB Device 1 (USB)
  EFI USB Device (USB)
  Internal EFI Shell

  ^ and v to change option, ENTER to select an option, ESC to exit


/------------------------------------------------------------------------------------------------------------------------------\
| F1  Help                                                      ^/v   Select Item                                              |
| Esc Exit                                                      Enter Select > SubMenu                                         |
\------------------------------------------------------------------------------------------------------------------------------/

You will see errors in MemTest86 Pro, since it’s injecting ECC errors to test the ECC functionality. I left MemTest86 Pro to run for about 6 hours and came back to this (report below).

Link to MemTest86 Pro HTML report

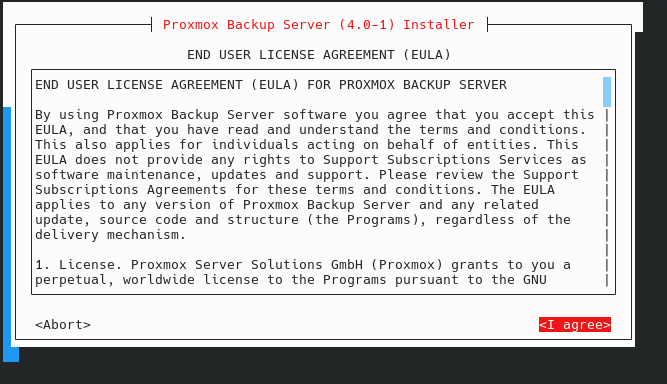
Installing Proxmox Backup Server

This is where things got difficult. I knew this device didn’t have graphics output, but didn’t realize just how many days I’d spend trying to get this to work.

I found this really helpful page about the DEC740 by Jochen Demmer, along with this accompanying YouTube video. In it, Jochen describes how he tried to install PVE, but was unable to get it to boot. I even emailed Jochen, but he had no further information than what was in the post and video. He actually ended up pulling the NVMe SSD out of the DEC740 and installing it in a different PC to write PVE to it.

Armed with that information, I wrote the PBS ISO directly to a USB flash drive using dd and immediately ran into the same issue as Jochen (not sure what I expected to happen). The error is below, nothing else on the screen. I suspect that this has something to do with the lack of a graphics output on this board and the fact that I’m using serial.

error: file `/boot/' not found.

I then wrote Ventoy to the USB flash drive and copied the PBS ISO to the mounted directory. Sure enough, Ventoy booted without issue (if you don’t set the two Uart Configuration Options in the BIOS from above, this won’t work)

                             GNU GRUB  version 2.04

 /----------------------------------------------------------------------------\
 |*proxmox-backup-server_4.0-1.iso                                            |
 |                                                                            |
 |                                                                            |
 |                                                                            |
 |                                                                            |
 |                                                                            |
 |                                                                            |
 |                                                                            |
 |                                                                            |
 |                                                                            |
 \----------------------------------------------------------------------------/

      Use the ^ and v keys to select which entry is highlighted.
      Ventoy 1.1.07 UEFI  www.ventoy.net
      L:Language  F1:Help  F2:Browse  F3:TreeView  F4:Localboot  F5:Tools
    F6:ExMenu

Choosing Boot in normal mode resulted in a black screen. However, choosing Boot in grub2 mode presented some other options.

                             GNU GRUB  version 2.04

 /----------------------------------------------------------------------------\
 |*Boot in normal mode                                                        |
 | Boot in grub2 mode                                                         |
 | File checksum                                                              |
 | Return to previous menu                                                    |
 |                                                                            |
 |                                                                            |
 |                                                                            |
 |                                                                            |
 |                                                                            |
 |                                                                            |
 |                                                                            |
 |                                                                            |
 |                                                                            |
 |                                                                            |
 |                                                                            |
 \----------------------------------------------------------------------------/

      Use the ^ and v keys to select which entry is highlighted.

Here, the only one that worked was choosing Advanced Options.

                             GNU GRUB  version 2.04

 /----------------------------------------------------------------------------\
 | Install Proxmox Backup Server (Graphical)                                  |
 | Install Proxmox Backup Server (Terminal UI)                                |
 |*Advanced Options                                                           |
 |                                                                            |
 |                                                                            |
 |                                                                            |
 |                                                                            |
 |                                                                            |
 |                                                                            |
 |                                                                            |
 |                                                                            |
 |                                                                            |
 |                                                                            |
 |                                                                            |
 |                                                                            |
 \----------------------------------------------------------------------------/

      Use the ^ and v keys to select which entry is highlighted.

Here, the only one that worked was choosing Install Proxmox Backup Server (Serial Console Debug Mode).

                             GNU GRUB  version 2.04

 /----------------------------------------------------------------------------\
 | Install Proxmox Backup Server (Debug Mode)                                 |
 | Install Proxmox Backup Server (Terminal UI, Debug Mode)                    |
 |*Install Proxmox Backup Server (Serial Console Debug Mode)                  |
 | Install Proxmox Backup Server (Automated)                                  |
 | Rescue Boot                                                                |
 | Test memory (memtest86+)                                                   |
 | UEFI Firmware Settings                                                     |
 |                                                                            |
 |                                                                            |
 |                                                                            |
 |                                                                            |
 |                                                                            |
 |                                                                            |
 |                                                                            |
 |                                                                            |
 \----------------------------------------------------------------------------/

      Use the ^ and v keys to select which entry is highlighted.

After showing the Linux boot log (progress!), I had to press Ctrl+D two separate times, and then the PBS serial installer started. From here, I installed PBS (in what would be my first of many attempts 😅).

proxmox serial installer

I’m unsure why Ventoy worked, when writing the PBS ISO directly to a USB flash drive with dd didn’t. A few notes:

  • In addition to dd and Ventoy, I also tried UNetbootin, KDE ISO Image Writer, and Raspberry Pi Imager.
  • I was unable to set the nomodeset kernel parameter in PBS, since I never got to the PBS boot menu in the first place.
  • The PBS installation documentation says that the Serial Console Debug Mode “sets up the Linux kernel to use the (first) serial port of the machine for in- and output”, but I was unsure how to trigger this manually.
  • I tried to edit the PBS ISO on the USB flash drive to change boot settings in /boot/grub/grub.cfg, but the filesystem seemed to be read-only, so I was unable to change anything (no matter how I wrote the ISO or how I mounted it).

Boot issues

If you install PBS using the above instructions and reboot, you’ll end up with some sort of boot issue, like a kernel panic.

[    3.747466] /dev/root: Can't open blockdev
[    3.752058] VFS: Cannot open root device "ZFS=rpool/ROOT/pbs-1" or unknown-block(0,0): error -6
[    3.761773] Please append a correct "root=" boot option; here are the available partitions:
[    3.771110] List of all bdev filesystems:
[    3.775592]  ext3
[    3.775594]  ext2
[    3.777743]  ext4
[    3.779894]  squashfs
[    3.782043]  vfat
[    3.784584]  fuseblk
[    3.786734]
[    3.790843] Kernel panic - not syncing: VFS: Unable to mount root fs on unknown-block(0,0)
[    3.800074] CPU: 0 UID: 0 PID: 1 Comm: swapper/0 Not tainted 6.14.8-2-pve #1
[    3.807948] Hardware name: Deciso B.V. OPNsense Desktop Security Appliance/Netboard-A10 Gen.3, BIOS 05.38.26.0025-A10.33 03/05/2025
[    3.821151] Call Trace:
[    3.823886]  <TASK>
[    3.826231]  dump_stack_lvl+0x5f/0x90
[    3.830326]  dump_stack+0x10/0x18
[    3.834028]  panic+0x12b/0x2fa
[    3.837446]  mount_root_generic+0x1cc/0x280
[    3.842121]  mount_root+0x13f/0x160
[    3.846018]  prepare_namespace+0x1e8/0x260
[    3.850592]  kernel_init_freeable+0x278/0x2c0
[    3.855461]  ? __pfx_kernel_init+0x10/0x10
[    3.860039]  kernel_init+0x1b/0x160
[    3.863936]  ret_from_fork+0x47/0x70
[    3.867929]  ? __pfx_kernel_init+0x10/0x10
[    3.872505]  ret_from_fork_asm+0x1a/0x30
[    3.876887]  </TASK>
[    3.879443] Kernel Offset: 0xe00000 from 0xffffffff81000000 (relocation range: 0xffffffff80000000-0xffffffffbfffffff)
[    3.891296] ---[ end Kernel panic - not syncing: VFS: Unable to mount root fs on unknown-block(0,0) ]---

The problem is that Ventoy in grub2 mode adds an extra kernel parameter rdinit=/vtoy/vtoy to the bootloader. This is documented here, here, and here. According to the Ventoy people, this is actually an issue with PBS, not Ventoy. The fix is to remove it and reboot, but doing that isn’t easy.

According to the documentation, ZFS uses systemd-boot, while XFS uses GRUB.

For EFI Systems installed with ZFS as the root filesystem systemd-boot is used, unless Secure Boot is enabled. All other deployments use the standard GRUB bootloader (this usually also applies to systems which are installed on top of Debian).

This means that the bootloader files that you need to update will depend on which bootloader you used, which is itself dependent on which filesystem you chose.

If you’re using ZFS on root

I had to boot into the Serial Console Debug Mode again (from Ventoy). From there, I imported the pool, then mounted it and the required directories.

# import the ZFS pool
# the key is the -N flag, which doesn't mount the ZFS filesystem (since we already have a / mount, we can't mount / over it)
zpool import
zpool import -f -N rpool
zpool list

# mount the zpool to /mnt
# again, we're going out of our way to not auto-mount / over top of /
zfs set mountpoint=legacy rpool/ROOT/pbs-1
mount -t zfs rpool/ROOT/pbs-1 /mnt
ls -la /mnt/etc/kernel

# mount required directories
mount -t proc proc /mnt/proc
mount -t sysfs sys /mnt/sys
mount --rbind /dev /mnt/dev
mount --rbind /run /mnt/run
mkdir -p /mnt/boot/efi
mount /dev/nvme0n1p2 /mnt/boot/efi

Then, we’re doing a chroot, editing the files, and rebuilding the bootloader.

# chroot in
chroot /mnt /bin/bash

# find the files
# i think you only need to edit /etc/kernel/cmdline, but i'm editing both
grep -ir vtoy /etc

# edit the files
vi /etc/default/grub.d/installer.cfg
vi /etc/kernel/cmdline

# refresh the bootloader
proxmox-boot-tool refresh

Finally, we need to cleanup.

# set mountpoint back to / (so that we can boot later) and exit the chroot
zfs set mountpoint=/ rpool/ROOT/pbs-1
exit

# unmount
umount /mnt/boot/efi
umount /mnt/run
umount -l /mnt/dev
umount /mnt/sys
umount /mnt/proc
umount /mnt

# make sure /proc is mounted in the live environment and export the pool
mount -t proc proc /proc
zpool export rpool
reboot

Now, rebooting will start PBS up.

If you’re using XFS on root

After reboot, PBS didn’t successfully boot, but I was able see the boot menu and then press e at it.

                                                 GNU GRUB  version 2.12-9+pmx2

 /--------------------------------------------------------------------------------------------------------------------------\
 |*Proxmox Backup Server GNU/Linux                                                                                          |
 | Advanced options for Proxmox Backup Server GNU/Linux                                                                     |
 | Memory test (memtest86+x64.efi)                                                                                          |
 | Memory test (memtest86+x64.efi, serial console)                                                                          |
 | UEFI Firmware Settings                                                                                                   |
 |                                                                                                                          |
 |                                                                                                                          |
 |                                                                                                                          |
 |                                                                                                                          |
 |                                                                                                                          |
 |                                                                                                                          |
 |                                                                                                                          |
 |                                                                                                                          |
 |                                                                                                                          |
 |                                                                                                                          |
 |                                                                                                                          |
 |                                                                                                                          |
 |                                                                                                                          |
 |                                                                                                                          |
 |                                                                                                                          |
 |                                                                                                                          |
 |                                                                                                                          |
 |                                                                                                                          |
 |                                                                                                                          |
 |                                                                                                                          |
 |                                                                                                                          |
 |                                                                                                                          |
 |                                                                                                                          |
 \--------------------------------------------------------------------------------------------------------------------------/

      Use the ^ and v keys to select which entry is highlighted.
      Press enter to boot the selected OS, `e' to edit the commands before booting or `c' for a command-line. ESC to
      return previous menu.

This let me edit the linux line to remove rdinit=/vtoy/vtoy. Keep in mind this uses Emacs key-bindings, not Vim.

                                                 GNU GRUB  version 2.12-9+pmx2

 /--------------------------------------------------------------------------------------------------------------------------\
 |setparams 'Proxmox Backup Server GNU/Linux'                                                                               |
 |                                                                                                                          |
 |        load_video                                                                                                        |
 |        insmod gzio                                                                                                       |
 |        if [ x$grub_platform = xxen ]; then insmod xzio; insmod lzopio; fi                                                |
 |        insmod part_gpt                                                                                                   |
 |        insmod lvm                                                                                                        |
 |        insmod xfs                                                                                                        |
 |        set root='lvmid/YpoGgW-14qn-h088-qtno-FYIK-V42G-A2uv1g/w0L6uL-O41B-YC8H-Ptrd-lOjp-0ZO8-CGt7E5'                    |
 |        if [ x$feature_platform_search_hint = xy ]; then                                                                  |
 |          search --no-floppy --fs-uuid --set=root --hint='lvmid/YpoGgW-14qn-h088-qtno-FYIK-V42G-A2uv1g/w0L6uL-O41B-YC8H-Pt|
 |d-lOjp-0ZO8-CGt7E5'  6570ee59-9fae-408e-bc20-acf495306d65                                                                 |
 |        else                                                                                                              |
 |          search --no-floppy --fs-uuid --set=root 6570ee59-9fae-408e-bc20-acf495306d65                                    |
 |        fi                                                                                                                |
 |        echo        'Loading Linux 6.14.8-2-pve ...'                                                                      |
 |        linux        /boot/vmlinuz-6.14.8-2-pve root=/dev/mapper/pbs-root ro  console=ttyS0,115200 rdinit=/vtoy/vtoy quiet|
 |        echo        'Loading initial ramdisk ...'                                                                         |
 |        initrd        /boot/initrd.img-6.14.8-2-pve                                                                       |
 |                                                                                                                          |
 |                                                                                                                          |
 |                                                                                                                          |
 |                                                                                                                          |
 |                                                                                                                          |
 |                                                                                                                          |
 |                                                                                                                          |
 |                                                                                                                          |
 |                                                                                                                          |
 |                                                                                                                          |
 \--------------------------------------------------------------------------------------------------------------------------/

      Minimum Emacs-like screen editing is supported. TAB lists completions. Press Ctrl-x or F10 to boot, Ctrl-c or F2
      for a command-line or ESC to discard edits and return to the GRUB menu.

Once you’re done, press F10 to boot, and PBS will start, but the fix is just temporary. From here, login as root and edit the file /etc/default/grub.d/installer.cfg to remove rdinit=/vtoy/vtoy, then run update-grub to permanently update your bootloader.

GRUB_TERMINAL_INPUT="console serial"
GRUB_TERMINAL_OUTPUT="gfxterm serial"
GRUB_SERIAL_COMMAND="serial --unit=0 --speed=115200"
GRUB_CMDLINE_LINUX="$GRUB_CMDLINE_LINUX console=ttyS0,115200 rdinit=/vtoy/vtoy"

Now, rebooting will start PBS up.

Setup Proxmox Backup Server

From here, you can connect an ethernet cable to your LAN interface and setup PBS. If you’re curious, here is the info about the five on-board NICs. The three RJ-45 ports are Intel I226-V and the two SFP+ ports are from the AMD CPU.

02:00.0 Ethernet controller: Intel Corporation Ethernet Controller I226-V (rev 04)
        Subsystem: Intel Corporation Device 0000
        Flags: bus master, fast devsel, latency 0, IRQ 31
        Memory at d0a00000 (32-bit, non-prefetchable) [size=1M]
        Memory at d0b00000 (32-bit, non-prefetchable) [size=16K]
        Capabilities: [40] Power Management version 3
        Capabilities: [50] MSI: Enable- Count=1/1 Maskable+ 64bit+
        Capabilities: [70] MSI-X: Enable+ Count=5 Masked-
        Capabilities: [a0] Express Endpoint, IntMsgNum 0
        Capabilities: [100] Advanced Error Reporting
        Capabilities: [140] Device Serial Number f4-90-ea-ff-ff-01-a3-d6
        Capabilities: [1c0] Latency Tolerance Reporting
        Capabilities: [1f0] Precision Time Measurement
        Capabilities: [1e0] L1 PM Substates
        Kernel driver in use: igc
        Kernel modules: igc

03:00.0 Ethernet controller: Intel Corporation Ethernet Controller I226-V (rev 04)
        Subsystem: Intel Corporation Device 0000
        Flags: bus master, fast devsel, latency 0, IRQ 66
        Memory at d0800000 (32-bit, non-prefetchable) [size=1M]
        Memory at d0900000 (32-bit, non-prefetchable) [size=16K]
        Capabilities: [40] Power Management version 3
        Capabilities: [50] MSI: Enable- Count=1/1 Maskable+ 64bit+
        Capabilities: [70] MSI-X: Enable+ Count=5 Masked-
        Capabilities: [a0] Express Endpoint, IntMsgNum 0
        Capabilities: [100] Advanced Error Reporting
        Capabilities: [140] Device Serial Number f4-90-ea-ff-ff-01-a3-d7
        Capabilities: [1c0] Latency Tolerance Reporting
        Capabilities: [1f0] Precision Time Measurement
        Capabilities: [1e0] L1 PM Substates
        Kernel driver in use: igc
        Kernel modules: igc

04:00.0 Ethernet controller: Intel Corporation Ethernet Controller I226-V (rev 04)
        Subsystem: Intel Corporation Device 0000
        Flags: bus master, fast devsel, latency 0, IRQ 76
        Memory at d0600000 (32-bit, non-prefetchable) [size=1M]
        Memory at d0700000 (32-bit, non-prefetchable) [size=16K]
        Capabilities: [40] Power Management version 3
        Capabilities: [50] MSI: Enable- Count=1/1 Maskable+ 64bit+
        Capabilities: [70] MSI-X: Enable+ Count=5 Masked-
        Capabilities: [a0] Express Endpoint, IntMsgNum 0
        Capabilities: [100] Advanced Error Reporting
        Capabilities: [140] Device Serial Number f4-90-ea-ff-ff-01-a3-d8
        Capabilities: [1c0] Latency Tolerance Reporting
        Capabilities: [1f0] Precision Time Measurement
        Capabilities: [1e0] L1 PM Substates
        Kernel driver in use: igc
        Kernel modules: igc

06:00.1 Ethernet controller: Advanced Micro Devices, Inc. [AMD] XGMAC 10GbE Controller
        Subsystem: Advanced Micro Devices, Inc. [AMD] XGMAC 10GbE Controller
        Flags: bus master, fast devsel, latency 0, IRQ 32
        Memory at d0060000 (32-bit, non-prefetchable) [size=128K]
        Memory at d0040000 (32-bit, non-prefetchable) [size=128K]
        Memory at d0082000 (64-bit, non-prefetchable) [size=8K]
        Capabilities: [48] Vendor Specific Information: Len=08 <?>
        Capabilities: [50] Power Management version 3
        Capabilities: [64] Express Endpoint, IntMsgNum 0
        Capabilities: [a0] MSI: Enable- Count=1/8 Maskable- 64bit+
        Capabilities: [c0] MSI-X: Enable+ Count=7 Masked-
        Capabilities: [100] Vendor Specific Information: ID=0001 Rev=1 Len=010 <?>
        Capabilities: [150] Advanced Error Reporting
        Capabilities: [2a0] Access Control Services
        Kernel driver in use: amd-xgbe
        Kernel modules: amd_xgbe

06:00.2 Ethernet controller: Advanced Micro Devices, Inc. [AMD] XGMAC 10GbE Controller
        Subsystem: Advanced Micro Devices, Inc. [AMD] XGMAC 10GbE Controller
        Flags: bus master, fast devsel, latency 0, IRQ 39
        Memory at d0020000 (32-bit, non-prefetchable) [size=128K]
        Memory at d0000000 (32-bit, non-prefetchable) [size=128K]
        Memory at d0080000 (64-bit, non-prefetchable) [size=8K]
        Capabilities: [48] Vendor Specific Information: Len=08 <?>
        Capabilities: [50] Power Management version 3
        Capabilities: [64] Express Endpoint, IntMsgNum 0
        Capabilities: [a0] MSI: Enable- Count=1/8 Maskable- 64bit+
        Capabilities: [c0] MSI-X: Enable+ Count=7 Masked-
        Capabilities: [100] Vendor Specific Information: ID=0001 Rev=1 Len=010 <?>
        Capabilities: [150] Advanced Error Reporting
        Capabilities: [2a0] Access Control Services
        Kernel driver in use: amd-xgbe
        Kernel modules: amd_xgbe

Conclusion

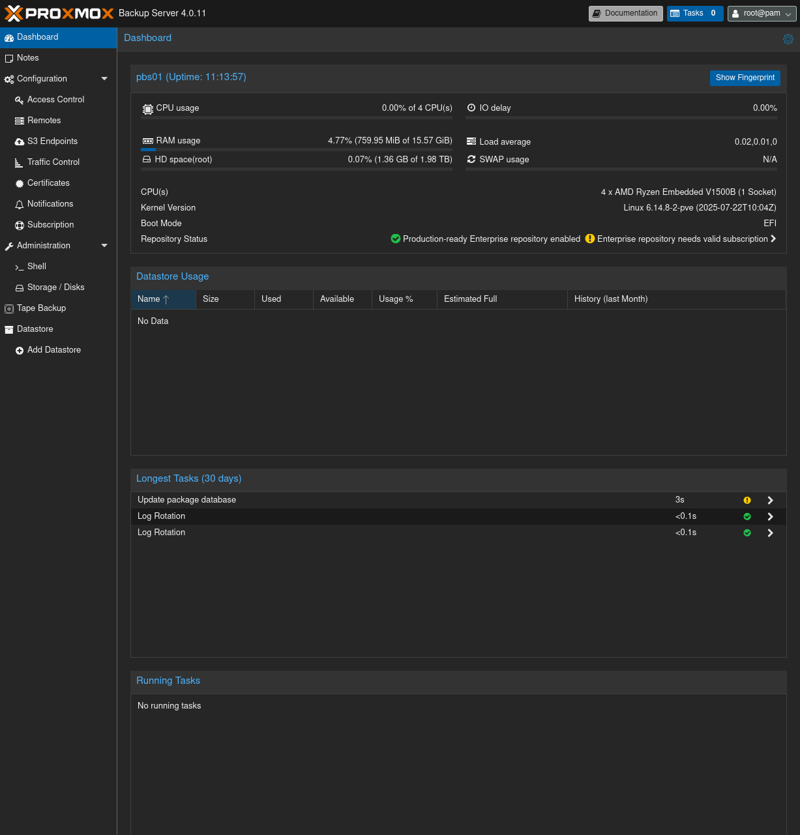
I don’t have PBS 100% setup or connected to PVE yet (I’m still working on that), but I don’t forsee having any issues 🤞. My ultimate plan is to backup PVE to PBS, and then have PBS sync all that content to my NAS (for backup to the cloud).

pbs dashboard

-Logan