
Hey! Listen! This post is part of a series on using OpenWrt. Check them all out!
| Date | URL | Part |
|---|---|---|
| 2026-05-23 | A dead-simple OpenWrt setup on the Flint 2 | OpenWrt simple setup |
| 2024-02-06 | Beryl travel router with OpenWrt | OpenWrt revisited |
| 2016-04-28 | OpenWrt upgrade process | OpenWrt upgrade |
| 2015-08-26 | OpenWrt with OpenVPN server on TP-Link Archer C7 | Initial post |
| 2015-02-15 | OpenWrt with OpenVPN client on TP-Link TL-MR3020 | Initial post |
Update: 2026-03-12
Another release of OpenWrt, another smooth upgrade! First, I installed owut.
opkg update && opkg install owut
Then, I checked my upgrade path.
owut check --verbose --version-to 25.12
Finally, I upgraded to 25.12.
owut upgrade --verbose --version-to 25.12
Update: 2025-07-22
A lot has changed in the world of OpenWrt!
The opkg package manager has been replaced by apk, the same package manager from Alpine Linux. However, apk is currently only available on SNAPSHOT builds, so I’m guessing it will come as default in the 25.xx version.
In addition, there is yet another tool to upgrade OpenWrt installations called owut (insert xkcd standards comic here). At the very least, this one seems to be the be-all, end-all upgrade tool. There was another tool called auc that owut replaced, by the way.
I just performed a patch upgrade on my travel router, from version 24.10.0 to 24.10.2. First, I installed owut.
opkg update && opkg install owut
This is the result of checking for an upgrade.
root@OpenWrt_TR:~# owut check
ASU-Server     https://sysupgrade.openwrt.org
Upstream       https://downloads.openwrt.org
Target         ramips/mt7621
Profile        glinet_gl-mt1300
Package-arch   mipsel_24kc
Version-from   24.10.0 r28427-6df0e3d02a (kernel 6.6.73)
Version-to     24.10.2 r28739-d9340319c6 (kernel 6.6.93)
95 packages are out-of-date
It is safe to proceed with an upgrade
To perform the upgrade, I only had to run the command below and the router rebooted.
owut upgrade
I’ll have to wait for the next major version (e.g., 25.xx) to see if owut can upgrade to that version, or if I’ll have to use the sysupgrade instructions for that.
Update: 2025-02-19
I’ve used this travel router half a dozen times without issue. My initial installation was on version 23.05.2, but I used a package called luci-app-attendedsysupgrade to do patch upgrades from within the OpenWrt web interface, following these instructions.
opkg update && opkg install luci-app-attendedsysupgrade
OpenWrt just released version 24.10, so I used the sysupgrade instructions to jump from 23.05.5 to 24.10.0. Apparently the luci-app-attendedsysupgrade package can’t do major upgrades.
Introduction
I’ve been on a couple trips in the last month and needed a way to share a single internet connection with multiple devices (e.g., Steam Deck, laptops, phones, etc…). It’s been over seven years since I last touched OpenWrt. 🤯 I thought it would be fun to setup OpenWrt on a travel router and to revisit OpenWrt to see what’s changed.
Design
Network overview
The idea here was to connect one device to my hotel’s WiFi, and then connect all of my other devices to that device. In this case, I would put my own OpenWrt router behind the hotel’s router (i.e., intentionally creating a double-NAT situation).
The OpenWrt router would be a proper router/firewall and would be useful for a situation where you either need to share a single internet connection with multiple devices, or where you don’t trust the upstream connection:
- paying for in-flight WiFi and sharing it with your other devices (although, I’m sure this is against some terms of service)
- a dorm/apartment/hotel where a shared network is provided by building management and you don’t 100% trust it
- physical network segmentation (as opposed to VLANs)
My desired setup was below.

Hardware
The trick with OpenWrt is to not get hardware that is too old (because it will have bad specs and be slow), but also not get something that is too new (because it won’t be supported yet).
I was looking for something that had the following features:
- physically small (it’s for travel, after all)
- good OpenWrt support (preferably with stable support, not snapshot images)
- dual-core CPU
- at least 128MB of RAM
- at least 16MB of flash storage (so I’m not having to expand storage onto an extroot like I used to do)
- at least two ethernet ports (WAN and LAN)
- at least two radios (WAN and LAN)
- USB-C power input
- 802.11ac (WiFi 5) or newer
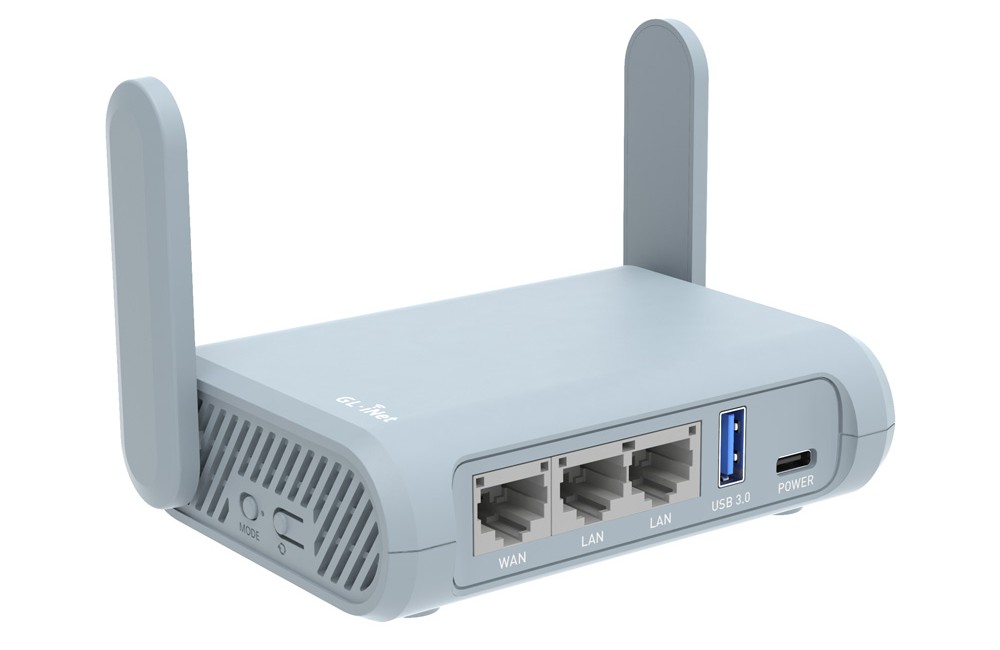
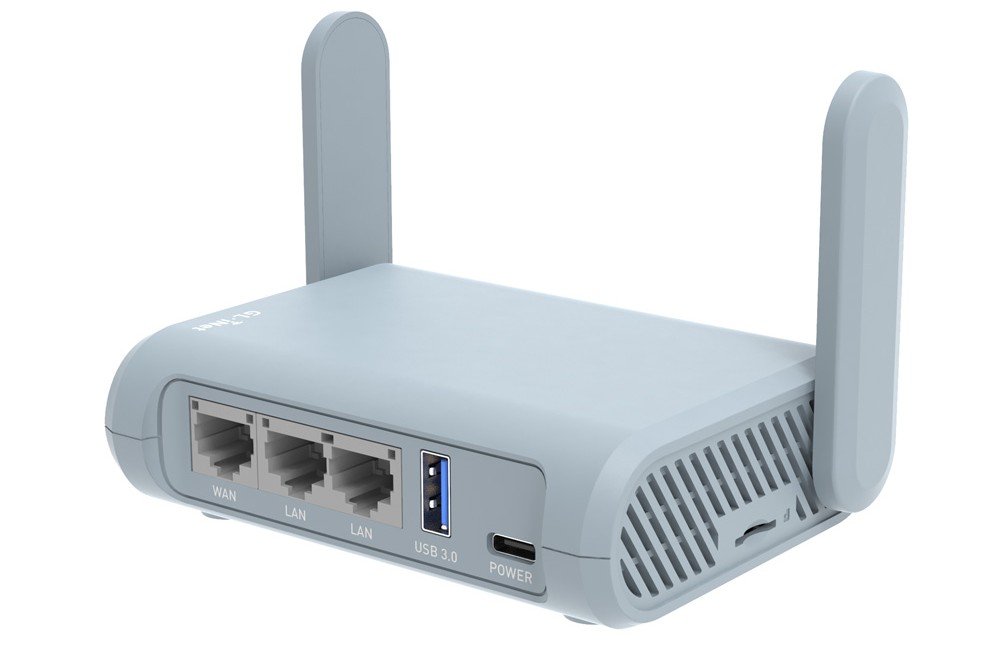
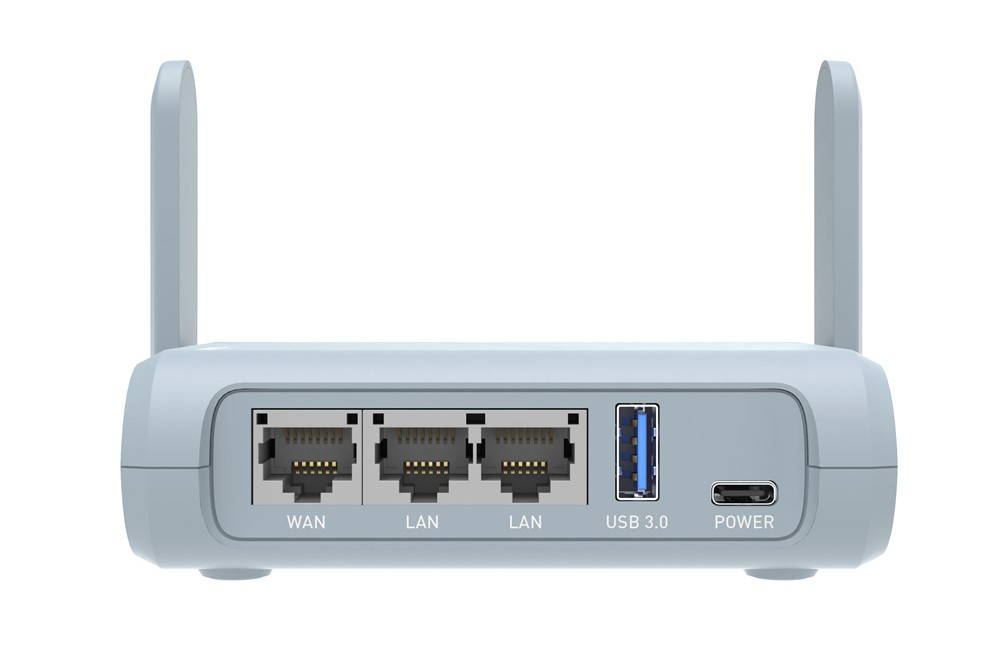
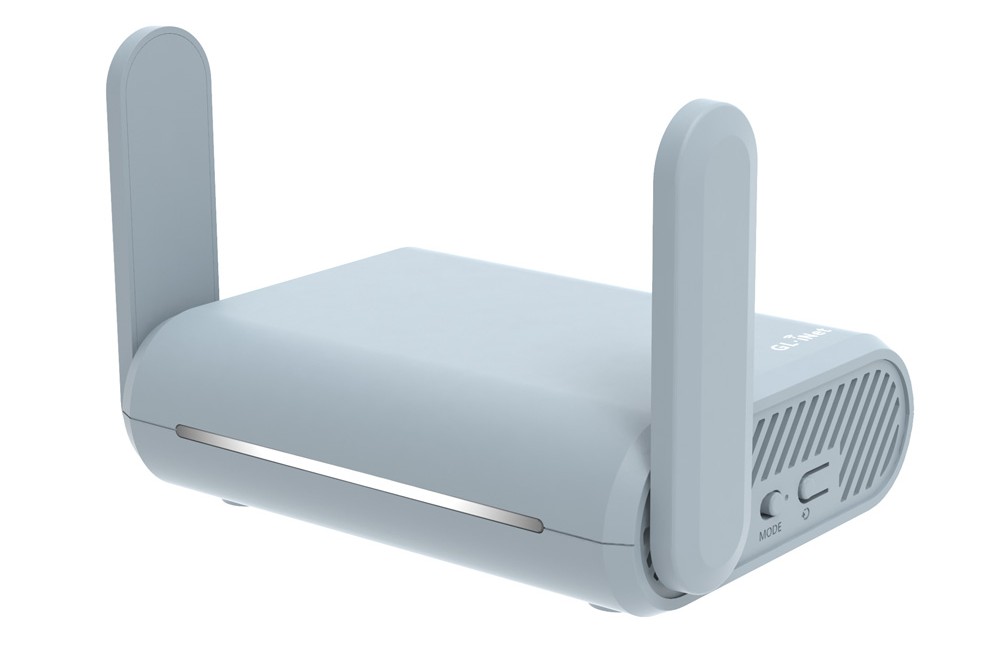
It just so happens that GL.iNet makes a bunch of full-size and travel routers that all run a custom version of OpenWrt. This was a great starting place, and I started looking at the OpenWrt Table of Hardware (ToH). The GL.iNet hardware was perfectly suited to my use case, so it was just a matter of picking a model that had the specs I wanted and was easily available. I ended up choosing the Beryl (GL-MT1300).

I also considered these models:
- MikroTik mAP
- Raspberry Pi 4 (like NetworkChuck used)
- TP-Link TL-WR902AC (this appears to be an upgraded version of the TL-MR3020 that I used to have)
- One of the various FriendlyElec NanoPi boards
- the newer Beryl AX (GL-MT3000) (isn’t yet supported by OpenWrt)
- the Slate Plus (GL-A1300)
Software
GL.iNet’s routers all run a custom version of OpenWrt. I’m unsure if the core OpenWrt code is stock, but at the very least, they run a proprietary (i.e., closed-source) UI on top of OpenWrt (although they do still let you access LuCI). Their UI looks great and exposes a bunch of one-click options that simplify setup.
- OpenVPN client/server
- WireGuard client/server
- Repeater
- 3G/4G USB modem
- Tethering
- Captive portal
- Dynamic DNS (DDNS)
- Hardware button settings
This is the 3.x version of the UI.
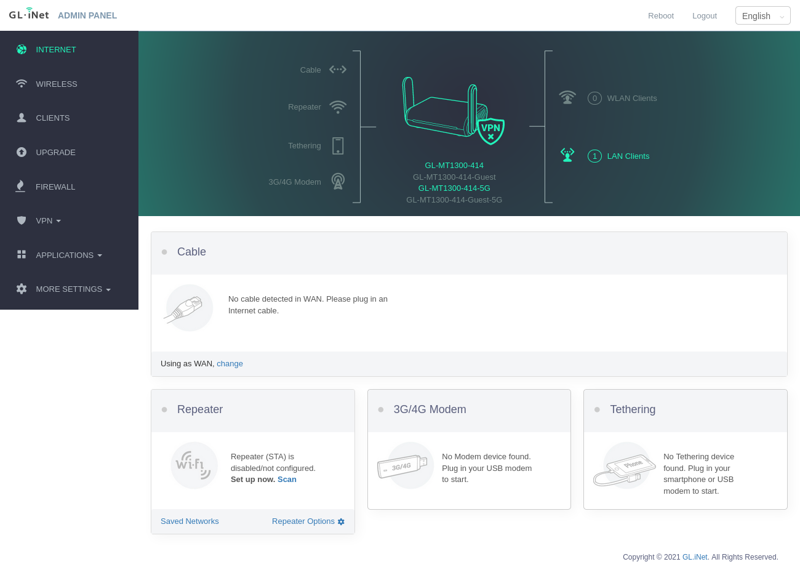
This is the 4.x version of the UI.

Unfortunately, this is the part where I mention that GL.iNet is a Chinese company, if that kind of thing bothers you. Regardless of that, I’d never run anything proprietary for something that’s controlling access to my network, so my plan was always to immediately replace GL.iNet’s version of OpenWrt with the stock version.
Setup
Install OpenWrt
OpenWrt has two kinds of installations:
- installing from vendor firmware (called a factory installation)
- upgrading OpenWrt (called a sysupgrade)
Because the Beryl already ran a version of OpenWrt from GL.iNet, I needed to do a sysupgrade. The installation process was pretty simple, and I’ve summarized the steps from the wiki page for the Beryl:
- On my laptop, I went to the OpenWrt Firmware Selector (this was much easier than navigating the firmware directories), found my model, downloaded the
sysupgradefile, and verified thesha256hash of the file - Connected to the Beryl’s LAN port (which after booting, gave me an IP in the
192.168.8.xrange) - Browsed to http://192.168.8.1/, went through the setup wizard, then browsed to http://192.168.8.1/#/upgrade and uploaded the
sysupgradefile - Hit an error that read
failed! ERROR: Incorrect firmware format! - Upgraded the factory firmware from
3.211to3.216to4.3.7from this page - Repeated step 3, waited 5 mins, and rebooted into OpenWrt at https://192.168.1.1/!
Configure OpenWrt
OpenWrt has a really interesting configuration system. It stores its configuration files in /etc/config in a system known as the Unified Configuration Interface (UCI). The UCI is basically a collection of easy-to-read configuration files that are all centrally located, making OpenWrt much easier to configure. You can edit these files manually with vi or nano, but there is also a command line tool called uci that you can use to edit the files (great for scripting).
The web interface for OpenWrt is called LuCI (I’m guessing it’s short for Lua UCI, because it’s written in Lua). What’s nice about LuCI is that it reads/writes from/to the UCI files. Any changes you make in LuCI are reflected in the UCI files, and vice versa, meaning you can configure OpenWrt from the web interface, or from the command line.
Initial login
Navigate to https://192.168.1.1/ in your browser and you’ll be greeted by an SSL error. This is because the web interface uses a self-signed certificate out of the box. It’s safe to click through this, since your traffic is encrypted and you know the certificate is from the router (or you can browse to http://192.168.1.1/ without HTTPS).
Moving on. Leave the username as “root” and the password field empty.
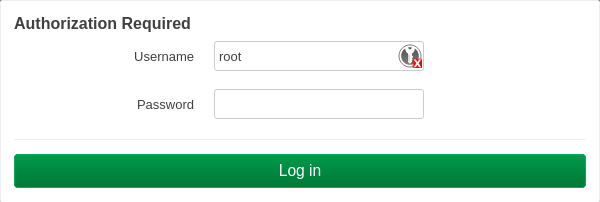
Click on Login to continue and you’ll see the status page.

Set a password
From the main status page, we’re going to set a root password by using the link in the yellow box at the top of the page. Here, you can (and should) set a root password. Click on Save to continue.

You can now SSH into the router with those credentials.
> ssh root@192.168.1.1
root@192.168.1.1's password:


BusyBox v1.36.1 (2023-11-14 13:38:11 UTC) built-in shell (ash)

  _______                     ________        __
 |       |.-----.-----.-----.|  |  |  |.----.|  |_
 |   -   ||  _  |  -__|     ||  |  |  ||   _||   _|
 |_______||   __|_____|__|__||________||__|  |____|
          |__| W I R E L E S S   F R E E D O M
 -----------------------------------------------------
 OpenWrt 23.05.2, r23630-842932a63d
 -----------------------------------------------------
root@OpenWrt:~#
Set hostname
First, set a hostname for the device and reboot.
uci set system.@system[0].hostname='OpenWrt_TR'
uci commit system
reboot
Secure SSH
SSH is listening on all interfaces (LAN and WAN), but I prefer to only be able to SSH via the LAN interface. Use the commands below to change that.
uci set dropbear.@dropbear[0].Interface='lan'
uci commit dropbear
service dropbear restart
LAN settings
Next, we’re going to change the default IP of the router from 192.168.1.1 to 10.70.74.1 (or whatever scheme you want). Most devices ship with 192.168.1.1 as the default, and since we’re going to be double-NATed, we can’t have two identical IPs on the same network. We’ll also set DNS here.
uci set network.lan.ipaddr='10.70.74.1'
uci set network.lan.force_link='1'
uci set network.lan.dns='8.8.8.8 1.1.1.1'
uci commit network
service network restart
Login again at the new address (not 192.168.1.1).
Devices vs interfaces
Now we need to clarify some terms. In OpenWrt, a “device” is a Linux kernel network device, like eth0, but also includes virtual devices like the default bridge called br-lan. You can see devices by typing ip link show on the command line (they’re the entries without the @ symbol).
An “interface” is a logical configuration associated with a specific device that allows you to define and manage network settings (e.g., IP addresses, subnet masks, security settings…). Confusingly, the devices and interfaces can (and do) sometimes have the same name by default (e.g., the wan interface is bound to the wan device).
In terms of wireless, a “radio” is a device (e.g., radio0), but it also has an interface (e.g., default_radio0) where you can setup your wireless networks.
Setup WANs
First, we’re going to create a wireless WAN interface called wwan.
uci set network.wwan='interface'
uci set network.wwan.proto='dhcp'
uci set network.wwan.peerdns='0'
uci set network.wwan.dns='8.8.8.8 1.1.1.1'
uci commit network
service network restart
Let’s also take this time to set the same DNS on the existing wired WAN interface called wan.
uci set network.wan.peerdns='0'
uci set network.wan.dns='8.8.8.8 1.1.1.1'
uci commit network
service network restart
Next, we need to enable both wireless radios and change the country code (adjust as needed).
uci set wireless.radio0.disabled='0'
uci set wireless.radio1.disabled='0'
uci set wireless.radio0.country='US'
uci set wireless.radio1.country='US'
uci commit wireless
service network restart
This next part is easier to do in the web interface. In LuCI, go to Network, then Wireless. You can see here that the Beryl has two radios (radio0 and radio1) each with an interface broadcasting a WiFi network called OpenWrt. You’ll need to decide which radio will be the WAN and which will be the LAN, but keep in mind that one is 2.4GHz and one is 5GHz.

I’ve never seen a hotel with great WiFi, so I’m going to make the 2.4GHz radio (radio0) my wireless WAN, and have the 5GHz radio (radio1) as my wireless LAN. This also works for me because all of my devices that will be on the wireless LAN support 5GHz. To set this up, go to radio0 and click on Scan (if you’re using the opposite radio, you’ll need to adjust the rest of this tutorial as needed).

Here, you’ll see all of the WiFi networks around you. I’m going to pick my home network for the setup, but at the hotel, you’ll do this same process again to select their WiFi.
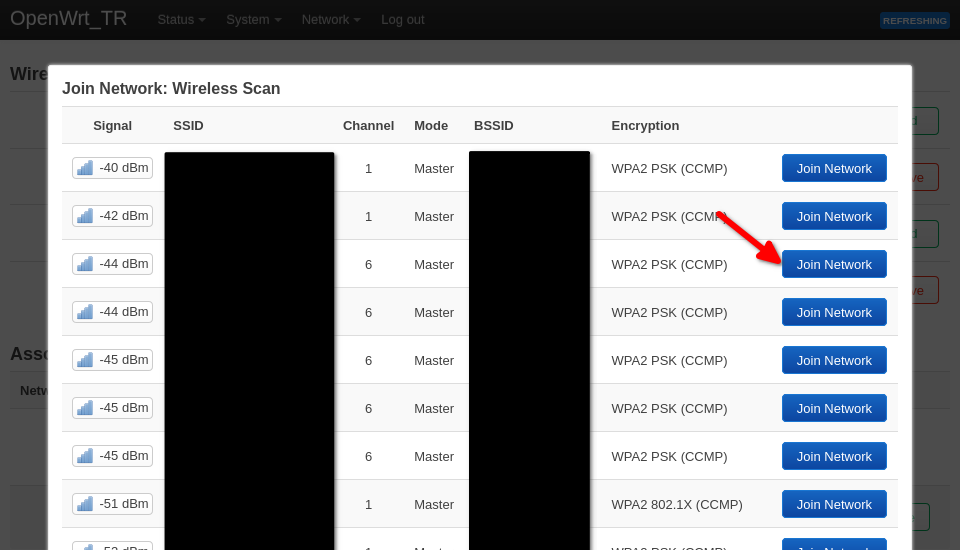
Make sure you check the box that says Replace wireless configuration, then enter your network’s WiFi password, click on Submit.
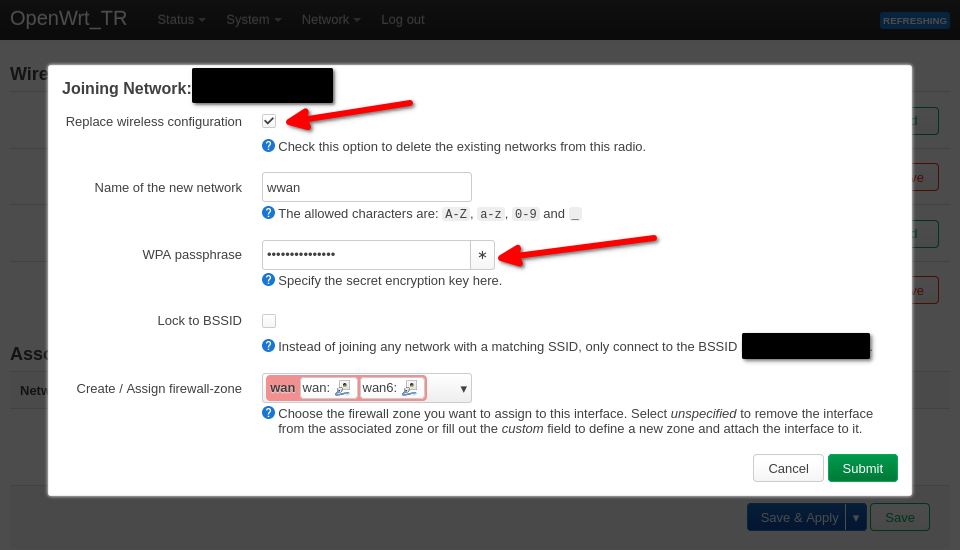
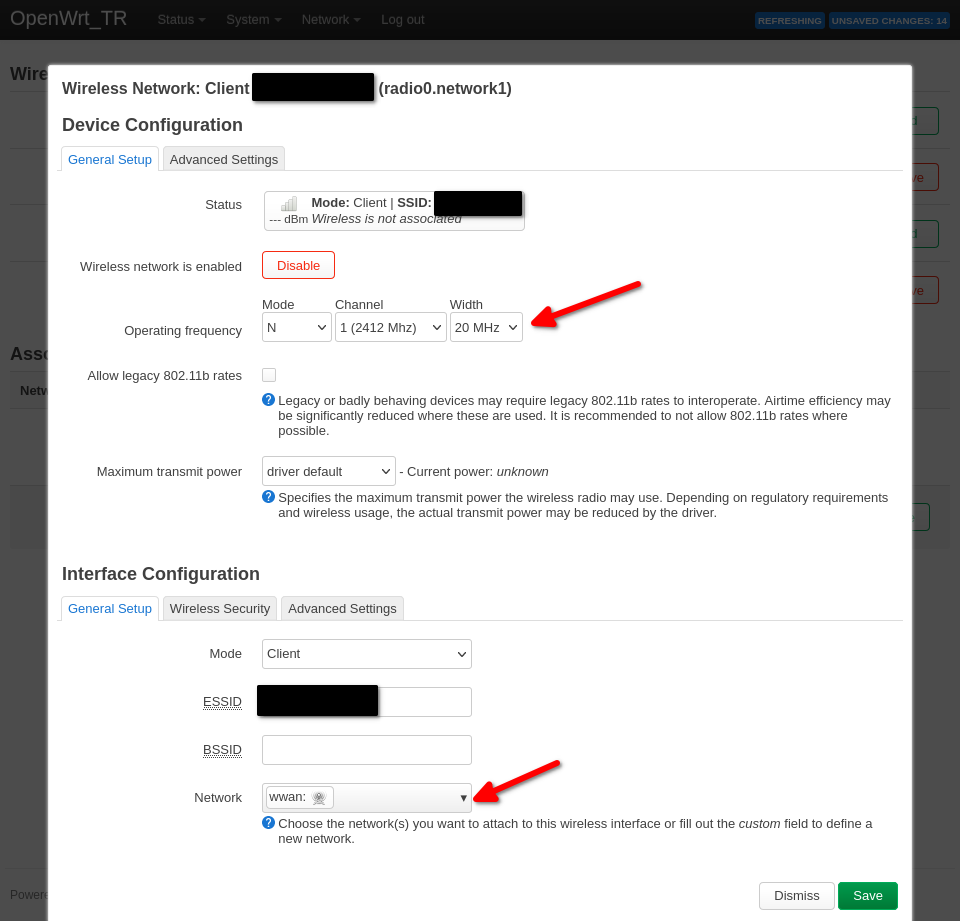
You can change the channel info here if you want. Past that, scroll down and make sure the Network is set to wwan (the interface we created earlier), and click on Save.
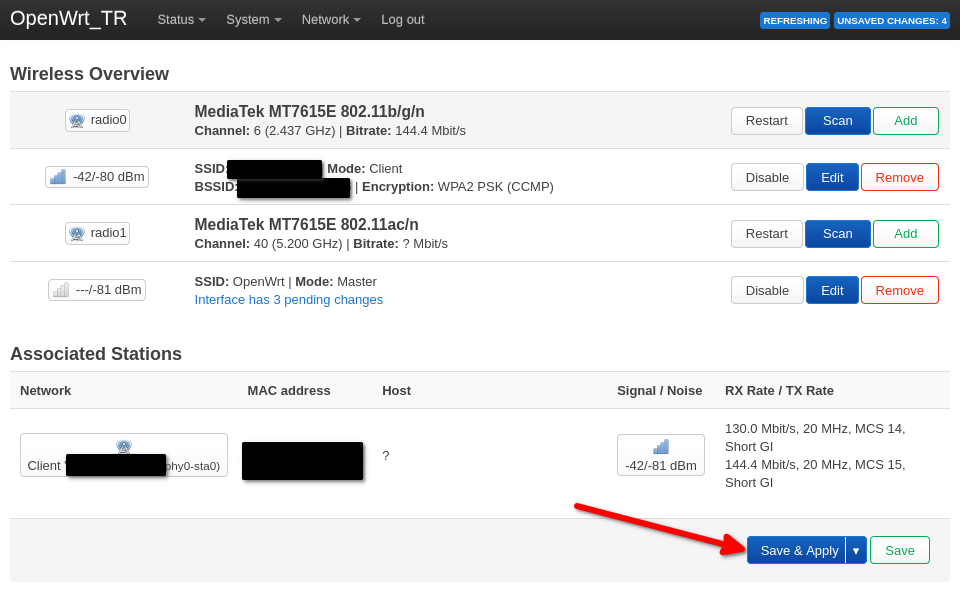
Back on the wireless page, click on Save & Apply.

At this point, the Beryl should be online and able to reach the internet. If you can’t reach the internet, make sure you typed the network password correctly.
ping google.com
Setup wireless LAN
Now we need to setup the WiFi on the wireless LAN. Start by going back to wireless page in LuCI and click on Edit on the WiFi network of radio1.

You can change the channel info here if you want. Past that, scroll down, and on the General Setup tab, change the ESSID to whatever you want to broadcast (I’m calling mine OpenWrt_Travel_Router) and make sure the Network is set to lan.

Then, on the Wireless Security tab, change the Encryption type to whatever you want. I’m going with WPA3-SAE, but if you have legacy devices that don’t support WPA3, you might want to go with WPA2-PSK (or choose one of the mixed modes). Once you’re done, click on Save.

Back on the wireless page, click on Save & Apply.
Checkpoint
Congrats, you’re done!
Disconnect the ethernet cable from the router and connect to the new SSID (mine was called OpenWrt_Travel_Router). You should get an IP in the same range as the wired connection (mine was 10.70.74.x).
Let’s take stock of where we’re at now. We have a travel router that has three basic interfaces:
- wireless WAN (the
radio0device) - wired WAN (the port labeled WAN)
- a LAN bridge (both LAN ports and
radio1)
Visually, that looks like this:

Notes
How to use this
- When you get to the hotel, power on the travel router and connect to the LAN (either wired or wireless)
- Login to LuCI
- If the upstream connection is wired, just plug the hotel ethernet into the WAN port on the Beryl
- If the upstream connection is wireless (more likely), go to
radio0and click on Scan (if you’re using the opposite radio, you’ll need to adjust). From the list of networks, select the hotel’s WiFi. On the next screen, make sure you check the box that says Replace wireless configuration, then enter your hotel’s WiFi password (if there is no password, leave it blank). - If the hotel has a captive portal, you just need to visit a page like https://google.com or http://neverssl.com on your client device and you’ll be redirected.
If you have issues
If you have problems connecting to captive portals and getting internet access, you might want to try disabling DNS rebind protection. This is because the OpenWrt router is behind another router (i.e., double-NAT), so DNS responses from the upstream router might contain private IPs (e.g., 10.0.0.0, 172.16.0.0, or 192.168.0.0).
uci set dhcp.@dnsmasq[0].rebind_protection='0'
uci commit dhcp
service dnsmasq restart
However, I’ve tried to work around this by setting 8.8.8.8 and 1.1.1.1 as upstream DNS servers, so they should return correct IPs, not private IPs (assuming that 8.8.8.8 and 1.1.1.1 are not blocked).
A note on VPN access
I chose not to install a VPN like WireGuard or Tailscale on the OpenWrt router. I prefer to run VPNs on each client device, but OpenWrt supports WireGuard and Tailscale.
In both cases, the hotels didn’t block my WireGuard VPN traffic from my phone to home. If they did, I would probably resort to using Tailscale.
Conclusion
In the end, the Beryl with OpenWrt performed beautifully. 👌
Neither hotel had a wired ethernet jack (that I could find), so I ended up using the hotel’s WiFi as my WAN, and connected my devices to the Beryl’s WiFi. The speed connected directly to the hotel WiFi was exactly the same as when running on the Beryl (i.e., the Beryl wasn’t a bottleneck). There was one time where I was on the Beryl’s WiFi but didn’t have internet access, so I rebooted the router and it worked fine after that. I should note that there is an OpenWrt package called travelmate that supposedly assists with connection handling, but I never needed it during my travels.

-Logan
