
Update: 2025-03-16
I picked up a set of aluminum plates for my Sinc, as well as some replacement rubber feet. You can see the aluminum on the right. Very pleased!
TL;DR
I got a new keyboard 😁
Introduction
⚠️ WARNING ⚠️
- This is an image-heavy post (I have lazy-loading enabled, so images should only load as you scroll)
- My only “good” lighting is in the kitchen, and I don’t have a DSLR or macro lens, so excuse the blurry close-up shots and shadows 🤷♂️
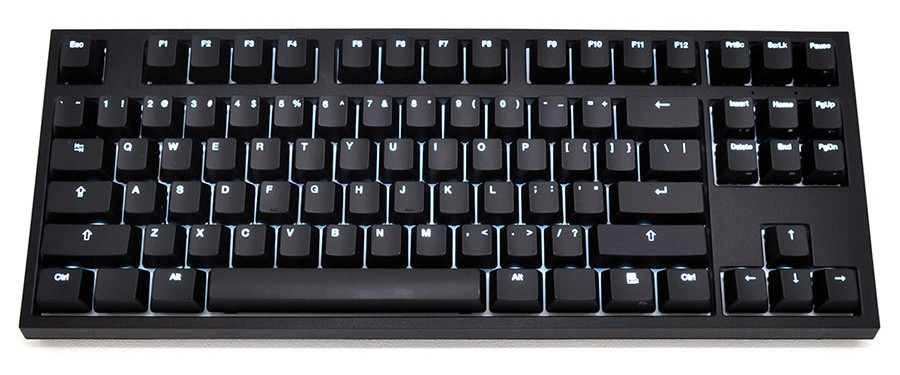
I’ve been using a WASD CODE 87-key mechanical keyboard with Cherry MX Clear switches since 2017. I liked it so much that I bought another (for when I used to work in the office).

I spend a lot of time in front of my computer, both for work and for hobbies. In an effort to not end up with repetitive strain injury years from now, I’ve been looking into more ergonomic keyboards.
The search
Why ergo?
A traditional keyboard can cause a few ergonomic problems:
- Ulnar Deviation - This is when your wrists bend outwards (toward your pinky finger) and can lead to carpal tunnel syndrome.
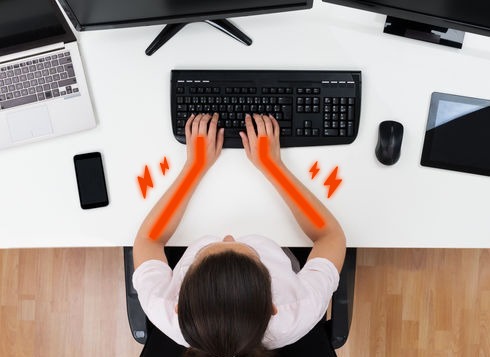
- Forearm Pronation - When typing with your palms face-down, it causes your radius and ulna to twist, which can lead to poor circulation and repetitive strain injuries (RSI).

- Wrist extension - This is when your wrists bend upwards and can cause poor circulation and numbness.

There are a number of ways to solve these problems, but the “perfect” keyboard would have the following qualities:
- Split in half to allow the arms to naturally rest shoulder-width apart (not bending the wrists)
- Each half would be slightly tilted downwards to allow the forearms to sit naturally (not twisting the radius and ulna)
- The slope of the keyboard would be minimized (or zero) to allow the wrists to rest naturally (this could also be accomplished by raising the wrists with a rest)
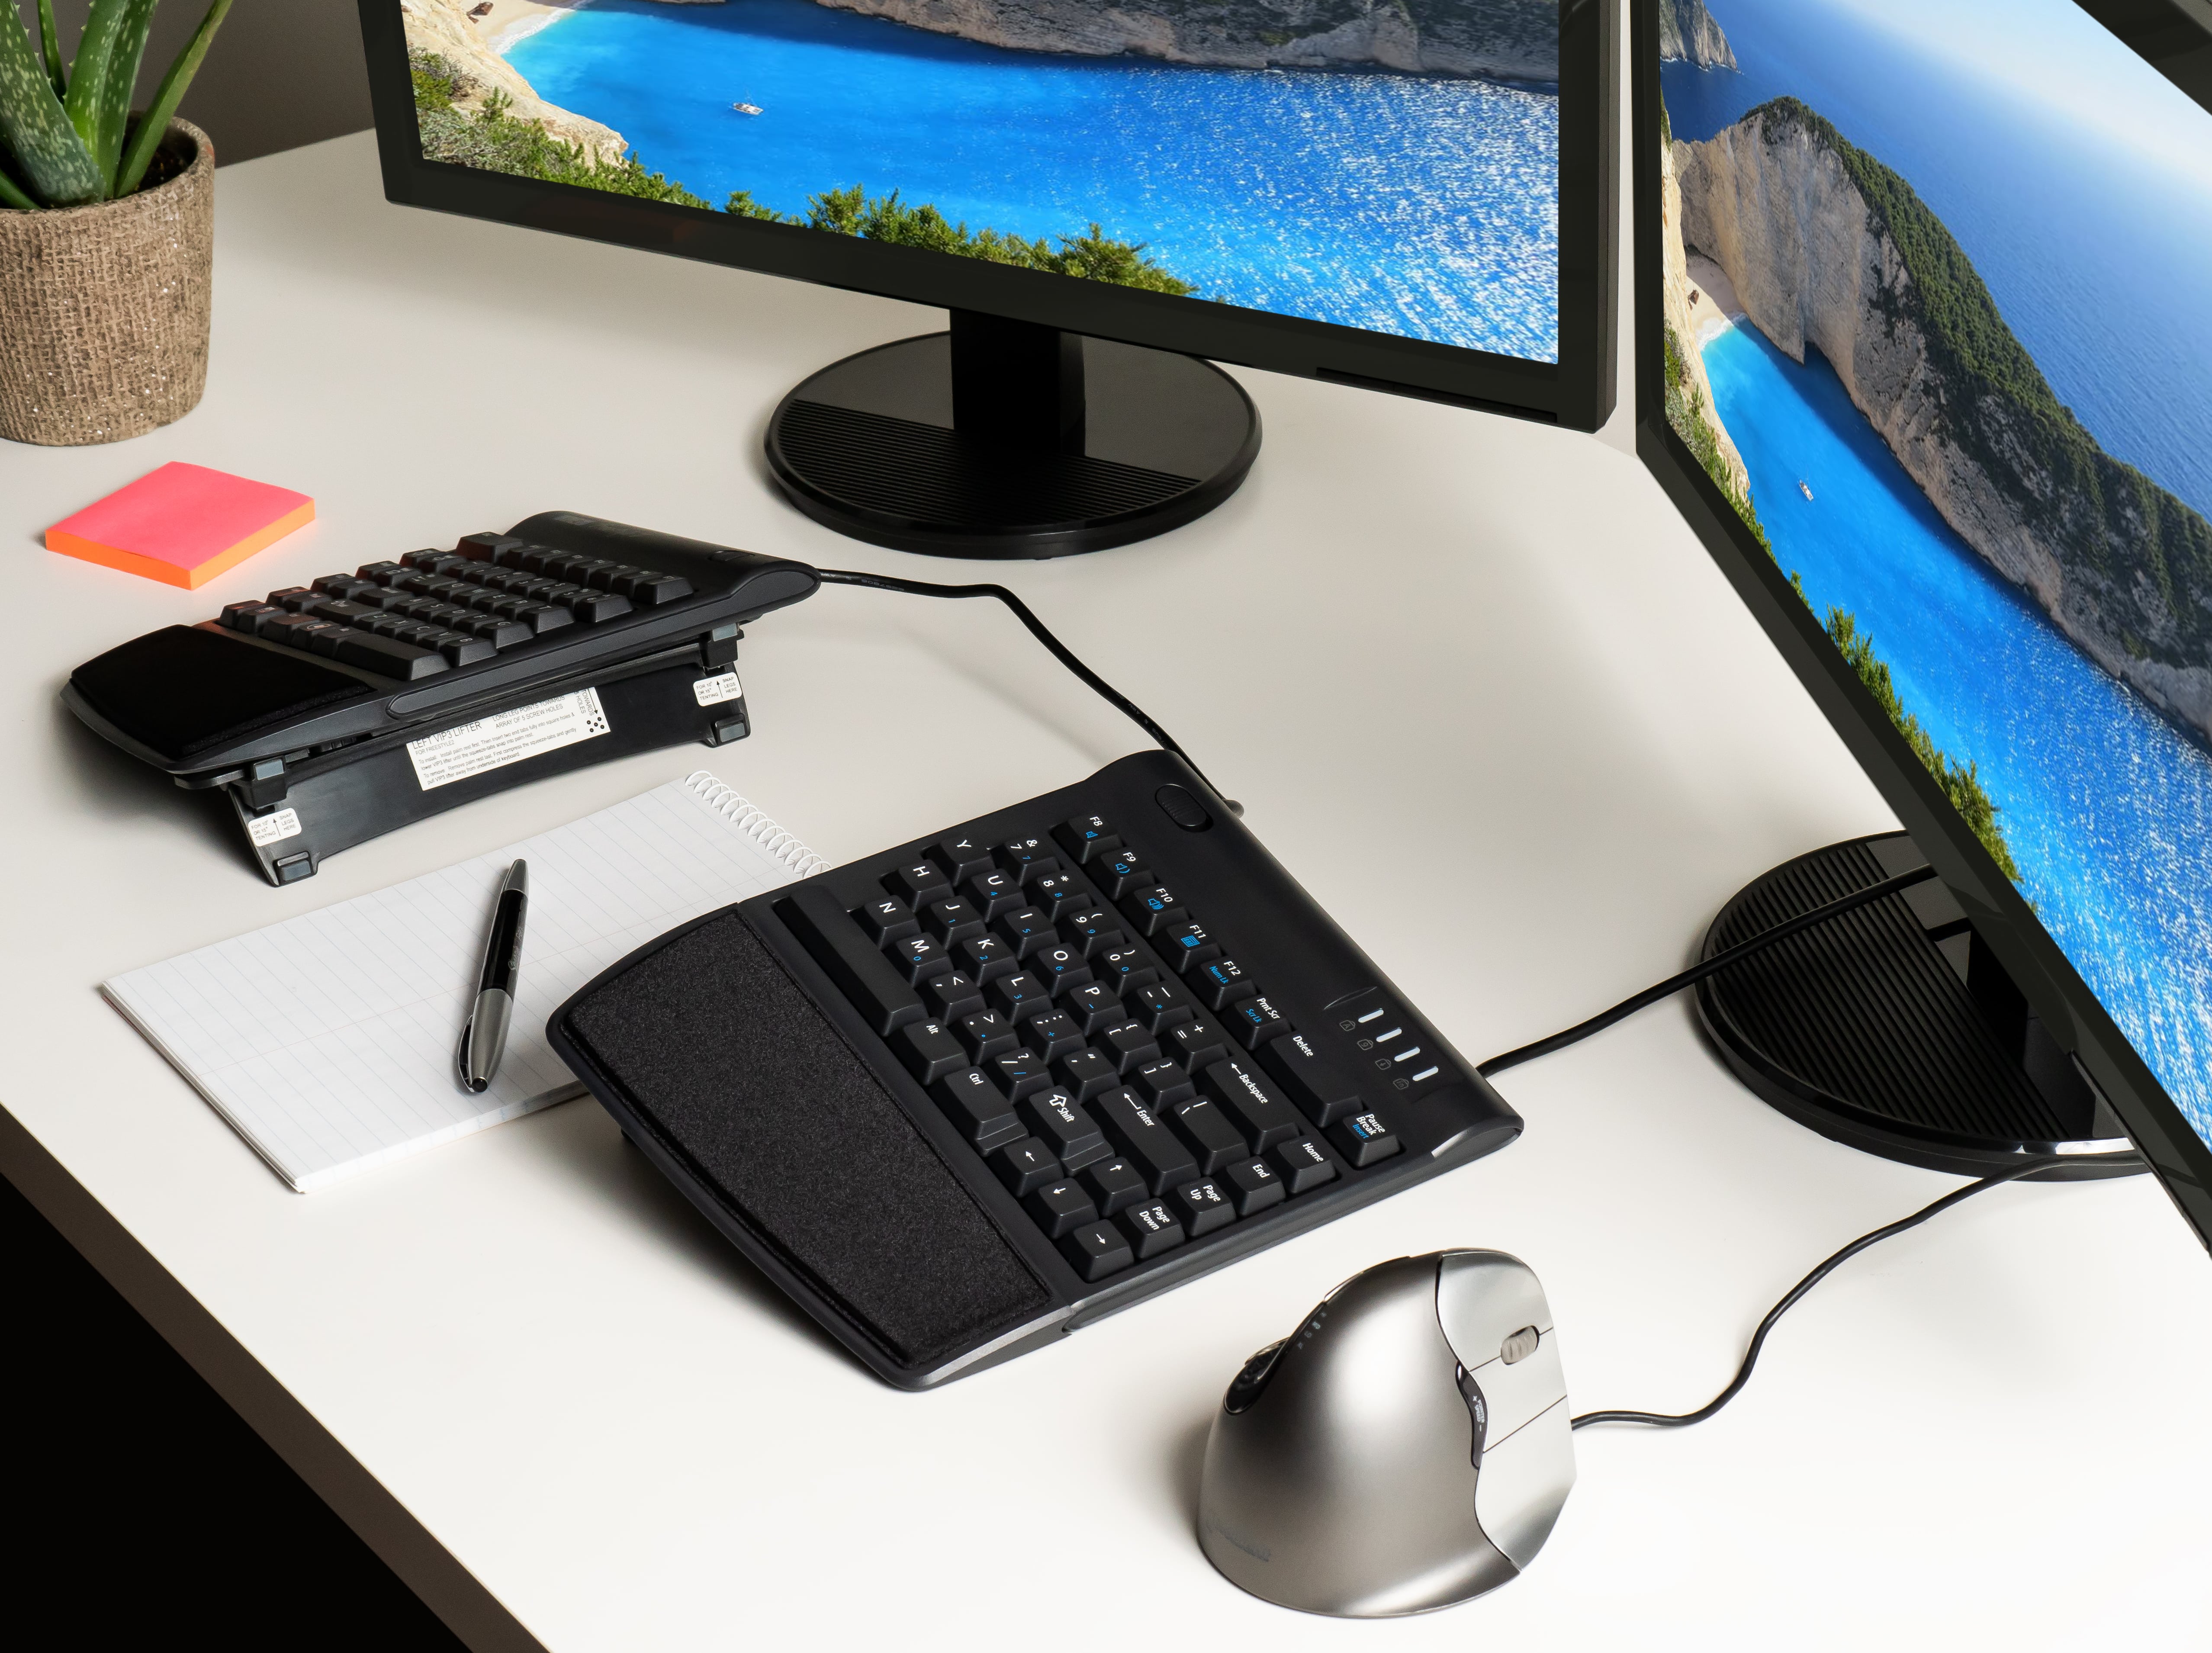
It won’t win any awards for looks, but the Kinesis Freestyle2 with the VIP3 tenting and palm rest kit is designed to tackle these exact problems (also note the ergonomic vertical mouse).
My options
Unfortunately, the Kinesis Freestyle2 isn’t “aesthetic” and is lacking a lot of enthusiast-level niceties (hotswap sockets, QMK support, USB-C, etc…).
Below are the keyboards I considered. They don’t solve all ergonomic challenges, but they’re all split boards (you’ll need to scroll left and right to see the entire table). There is also a great site here where you can compare even more split boards.
| Item | Starting price | Size | Layout | Hotswap | Connectivity | Software | Thumb cluster | Wrist-wrist | Tenting | Comments |
|---|---|---|---|---|---|---|---|---|---|---|
| Dygma Raise | $399 | 60% | Staggered | Yes | USB-C | Custom (Linux support) | Yes | Included | Extra | |
| Dygma Defy | $329 | 60% | Ortholinear | Yes | USB-C, Bluetooth, RF (WiFi) | Custom (Linux support) | Yes | Included | Extra | |
| Ultimate Hacking Keyboard | $320 | 60% | Staggered | Yes | USB-C | Custom (Linux support) | Extra | Extra | Extra | Removable thumb modules |
| ZSA Moonlander | $365 | 60% | Ortholinear | Yes | USB-C | QMK | Yes | Included | Included | |
| ZSA ErgoDox EZ | $354 | 60% | Ortholinear | Yes | USB-C (as-of Feb 2022) | QMK | Yes | Included | Included | |
| Keychron Q11 | $208 | 75% | Staggered | Yes | USB-C | QMK/VIA | No | Extra | None | 2 rotary encoders |
| Keebio Sinc | $89 | 75% | Staggered | Yes | USB-C | QMK/VIA | No | No | No | this is a kit only, 1 rotary encoder |
| nullbits SNAP | $99 | 75% | Staggered | Yes | USB-C | QMK/VIA | No | No | No | this is a kit only, 1 rotary encoder |
| Cloud Nine ErgoTKL | $169 | 75% | Staggered | No | USB-C | Custom (Windows-only) | No | Included | Included | 1 rotary encoder |
| MoErgo Glove80 | $399 | 75% | Ortholinear | No | USB-C, Bluetooth | ZMK | Yes | Included | Included | |
| Kinesis Advantage360 | $449 | 60% | Ortholinear | No | USB-C | Custom (Windows/Mac) | Yes | Included | Included | |
| Kinesis Freestyle Pro | $179 | 75% | Staggered | No | USB-A | Custom (Windows/Mac) | No | Extra | Extra | |
| Kinesis Freestyle2 for PC | $99 | 75% | Staggered | No | USB-A | Custom (Windows/Mac) | No | Extra | Extra |
Requirements
I do mostly office work and only a little gaming, so my only hard requirements were 75% layout (I wanted the F-row and arrow keys) and hotswap sockets. This left the following boards:
| Item | Starting price | Size | Layout | Hotswap | Connectivity | Software | Thumb cluster | Wrist-wrist | Tenting | Comments |
|---|---|---|---|---|---|---|---|---|---|---|
| Keychron Q11 | $208 | 75% | Staggered | Yes | USB-C | QMK/VIA | No | Extra | None | 2 rotary encoders |
| Keebio Sinc | $89 | 75% | Staggered | Yes | USB-C | QMK/VIA | No | No | No | this is a kit only, 1 rotary encoder |
| nullbits SNAP | $99 | 75% | Staggered | Yes | USB-C | QMK/VIA | No | No | No | this is a kit only, 1 rotary encoder |
My purchases
Board
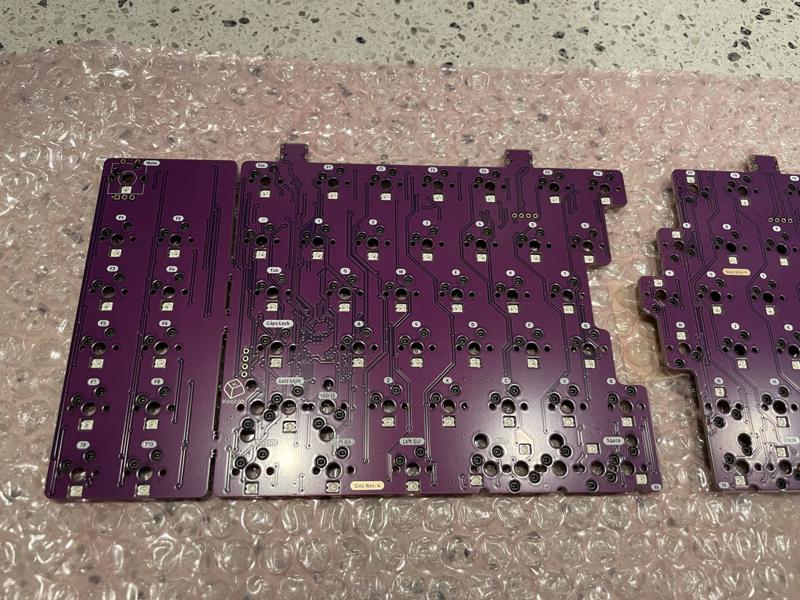
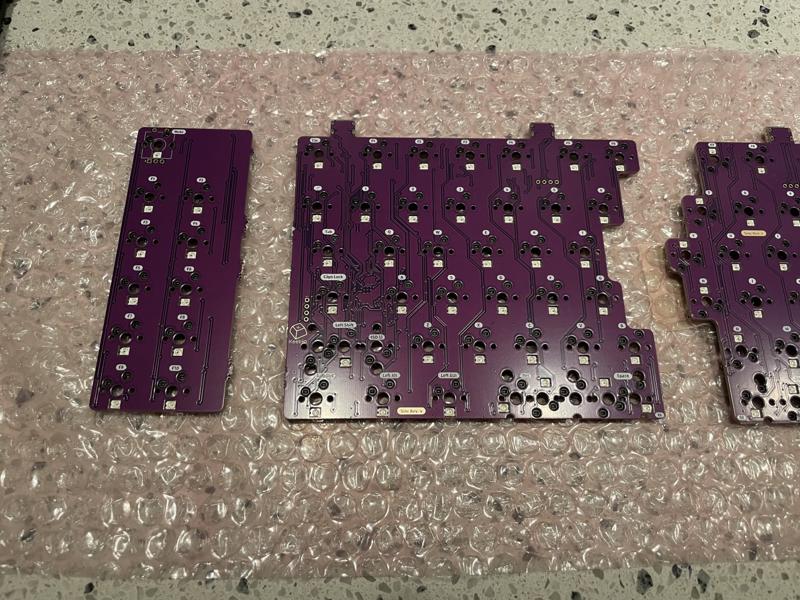
I ended up purchasing the Keebio Sinc. I was initially looking at the Keychron Q11, but the extra macro keys on the left (below) would make finding keycap sets more difficult (especially if the keys were sculpted).
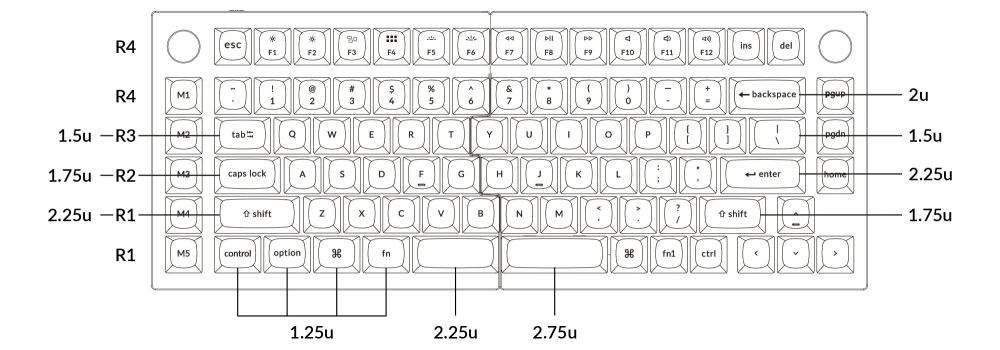
The Sinc comes in a Rev. 3 and Rev. 4 PCB, with the Rev. 4 having an additional circuit for more reliable startup as well as more layout options on the bottom row (see comparison below).
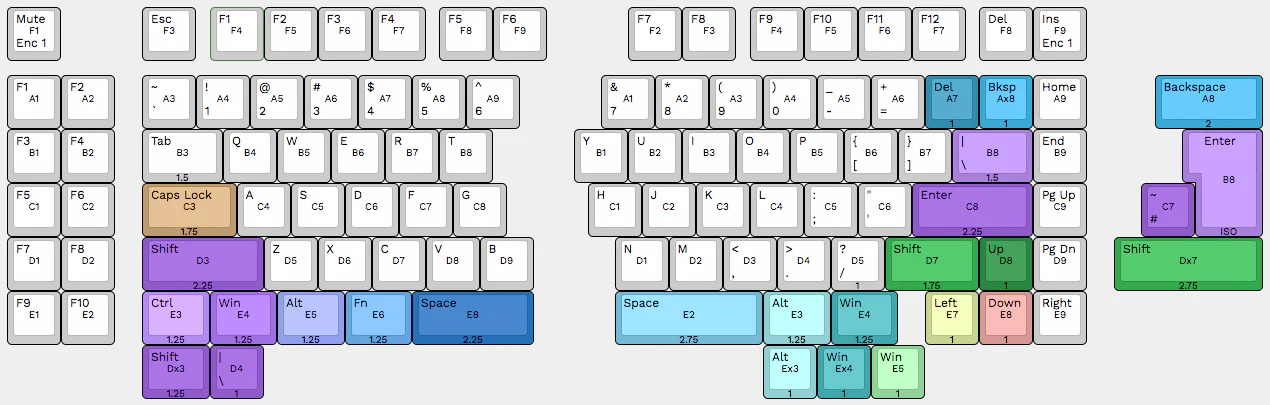
Below are the options I chose for the Sinc Rev. 4 (I didn’t want a left macro-pad and did want a rotary encoder on the right).

Switches
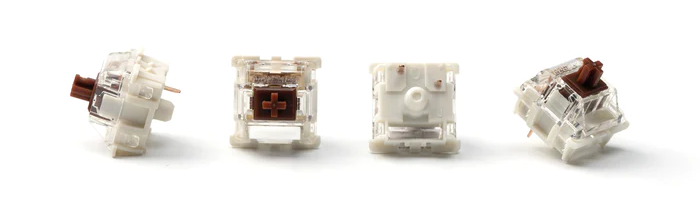
For switches, I like tactile and have been using Cherry MX Clear switches on my CODE board.
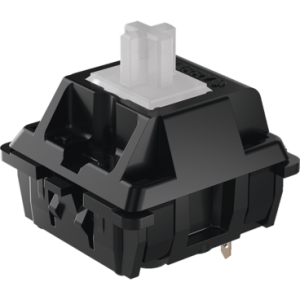
I decided to go with Gateron this time, just to try something different. Gateron Clear switches are linear (not tactile), so I went with the Gateron G Pro 3.0 Brown switches (the Pro series is pre-lubed). Side-note: This page is a great place to compare switches.
Keycaps
The Sinc has a split spacebar, so that removed a lot of keycap options right away. Below are some keycap sets I considered, but ultimately passed on because they didn’t have a split spacebar.
| Manufacturer | Name | Profile | Material |
|---|---|---|---|
| Kono | SA Granite | SA | dye-sublimated PBT |
| Kono | KDS Solarized Dark | Cherry | dye-sublimated PBT |
| Novelkeys??? | Cherry Milkshake | Cherry | dye-sublimated PBT |
| Novelkeys??? | DSA Milkshake | DSA | dye-sublimated PBT |
| Drop | /dev/tty | MT3 | dye-sublimated PBT |
| Drop | Camillo | MT3 | doubleshot ABS |
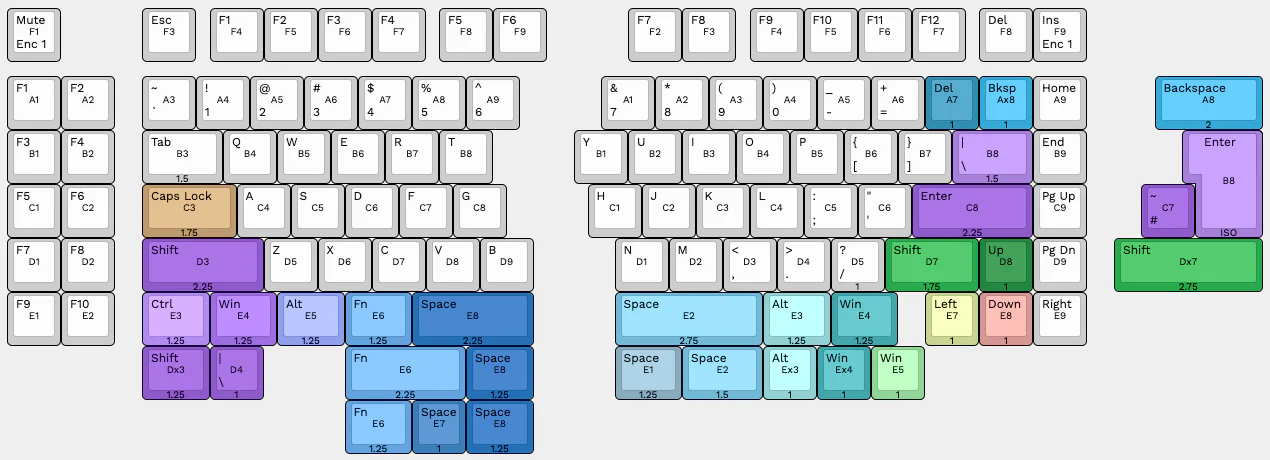
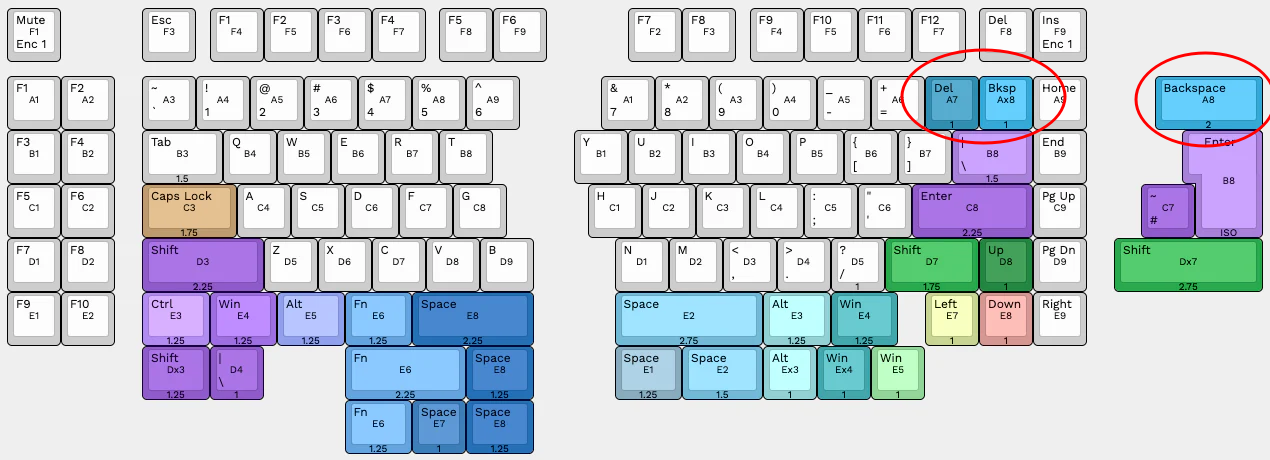
In addition to the split spacebar, I also had to decide if I wanted to use a delete/backspace split or a single backspace key (see below).
Below are keycap sets that seemed like they would fit the Sinc (i.e., they had a split spacebar and a 1U key to take the place of backspace).
| Manufacturer | Name | Profile | Material | Comments |
|---|---|---|---|---|
| Milkyway | MW Retro Lights | Cherry | dye-sublimated PBT | |
| Domikey | DMK Ghost | Cherry | doubleshot ABS | Spacebar kit sold out |
| GMK | GMK Foundation | Cherry | doubleshot ABS | Novelties kit sold out |
| GMK | GMK DUALSHOT 2 | Cherry | doubleshot ABS | |
| GMK | MTNU WOB | MTNU | doubleshot PBT | Pre-order |
| GMK | MTNU SUSU | MTNU | doubleshot PBT | Pre-order |
| Signature Plastics | DSA Granite | DSA | dye-sublimated PBT | Individual keys separate |
| Signature Plastics | DSA Petrikeys | DSA | doubleshot ABS | Would prefer text modifiers |
| Signature Plastics | Oblivion V2 | SA | doubleshot ABS | |
| Signature Plastics | DSS Honeywell | DSS | doubleshot ABS | |
| Drop | Susuwatari | MT3 | doubleshot ABS | |
| Drop | /dev/tty R3 | MT3 | dye-sublimated PBT | Unicorn barf kit sold out |
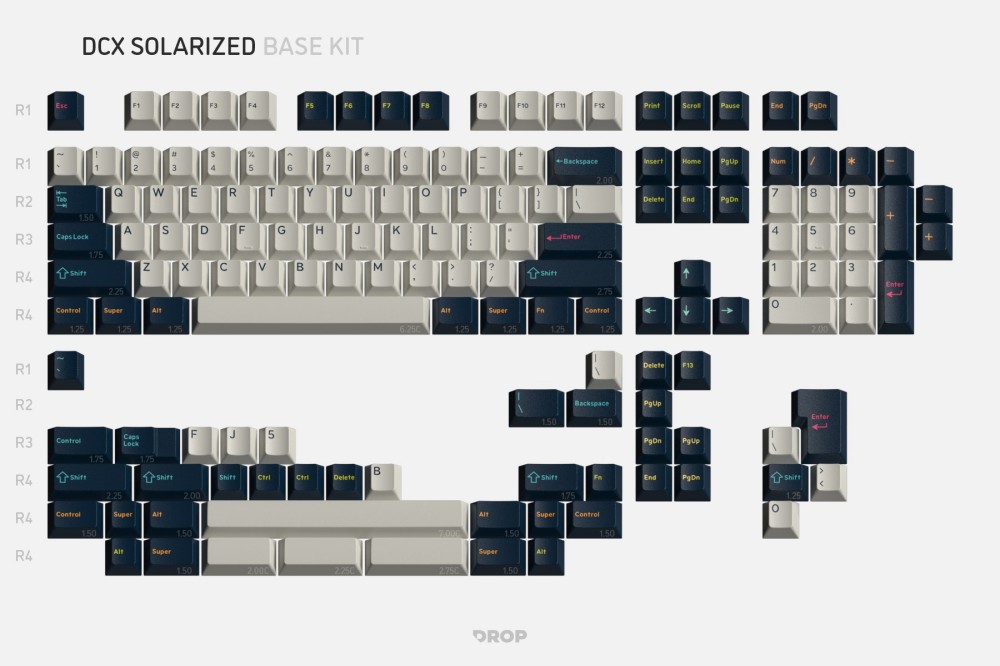
| Drop | DCX Solarized | DCX | doubleshot ABS | |
| PBTfans | Cookies ’n Creme | Cherry | doubleshot ABS | Would prefer text modifiers |
| PBTfans | Retro Dark Lights | Cherry | doubleshot PBT |
In the end, I purchased the DCX Solarized set. It didn’t have a dedicated 1U backspace key, so the F13 key would have to make due.
Other keycaps
I also considered these two sets of keycaps, but decided to wait and see how I liked the DCX Solarized.
- Oblivion V2
- DSA Granite (this would require 2 separate spacebars)
Wrist wrest
For the CODE, I had purchased a wrist rest (technically palm rest?) from a redditor.
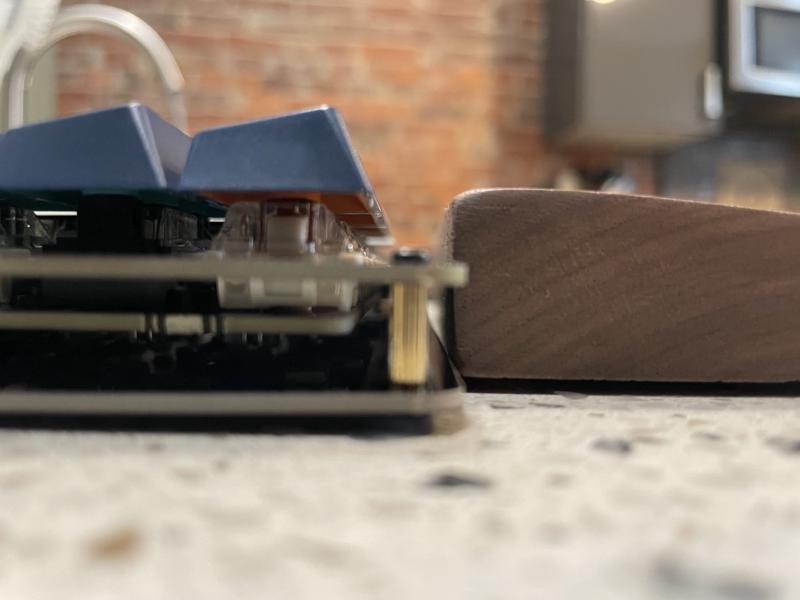
Obviously the Sinc has a split design, so I would need a split wrist rest. I ended up purchasing three, but at the time of this writing, only the first has arrived to my house.
- OKKOwood on Etsy (30 days to arrive from Slovenia)
- Keychron Wooden Palm Rest (this was actually for the Q11, so I’m not sure how well it will fit)
- Digital Carpentry (it turns out this is the same redditor, now with a store!)
Prices
All-in-all, here is what I purchased. This setup was definitely expensive, but not out of line compared to some of the higher-end boards above (while being more customizable).
| Item | Price |
|---|---|
| Board (PCB and plates) | $134 |
| Switches | $31 |
| Keycaps | $99 |
| Wrist/palm rest | $70 |
| $334 (total) |
Build process
I won’t document the complete build process here, as Keebio already has a build video.
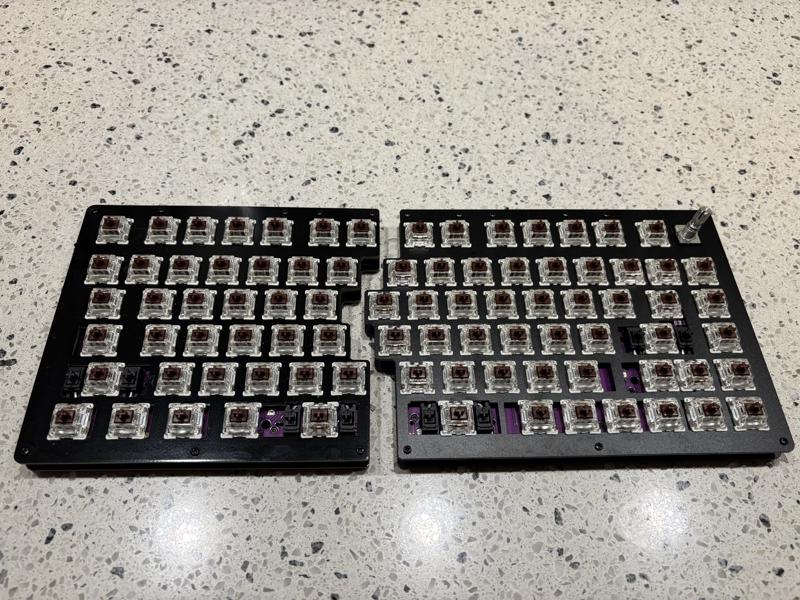
The first thing was to snap off the macropad on the left side (since I chose plates without the macropad).
I purchased the Sinc with a rotary encoder on the right side, which takes the place of a switch. This board layout is really clever in that you can choose a rotary encoder or switch in the same slot (see the multiple sets of holes).

This was the only soldering required (if you wanted a switch here, then no soldering at all).

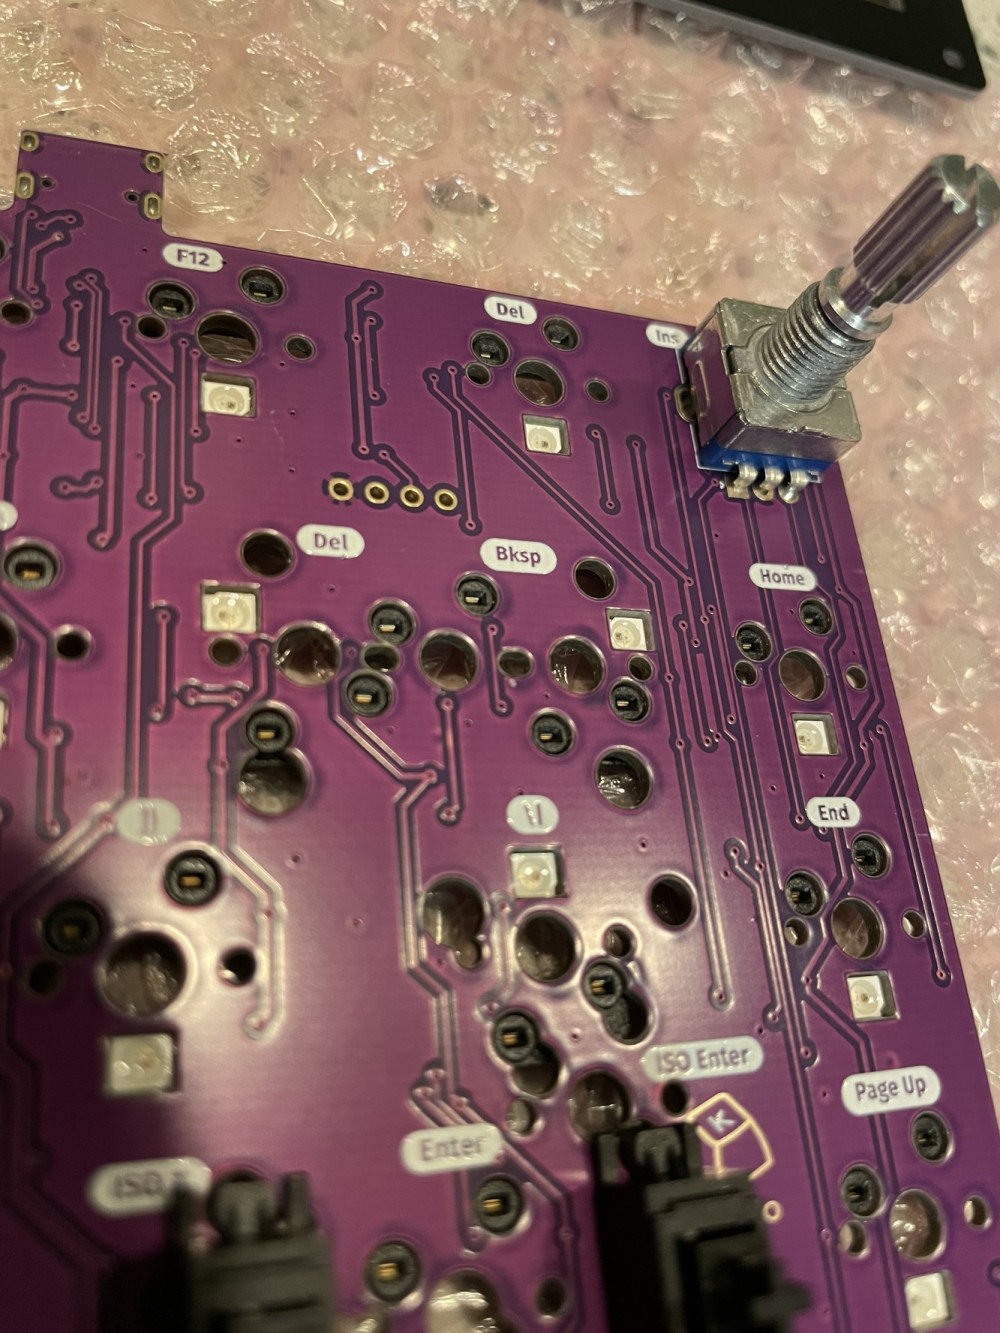
Next were the stabilizers. It took me forever to figure out that they were supposed to be mounted in these castellated mounting holes (i.e., the semi-circles on the very edge of the board).
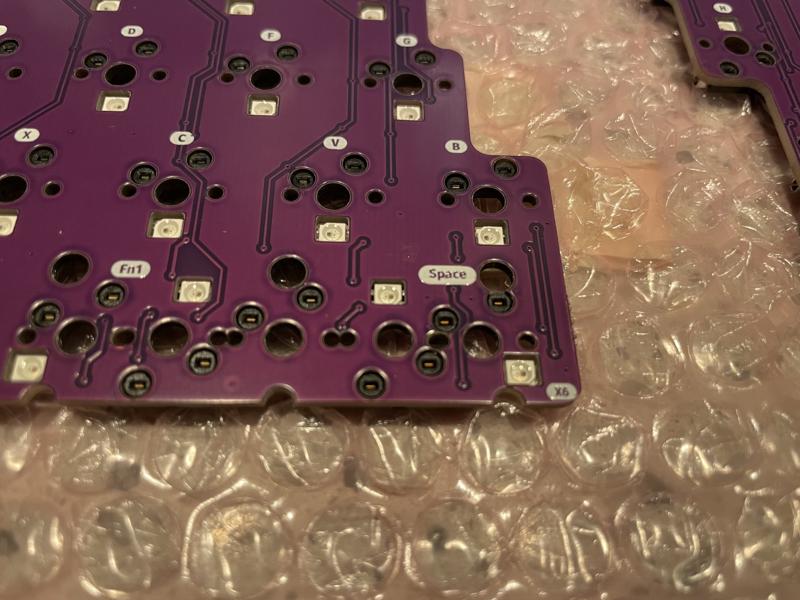
Again, this board layout is really clever and allows a delete/backspace split or a single backspace key (see the three sets of holes). I was going with a delete/backspace split, so I didn’t add a stabilizer here.
The Sinc is powered by a RP2040!

Here, I added the switches to the plate. After both halves were completed, I plugged it in and tested each switch using VIA.
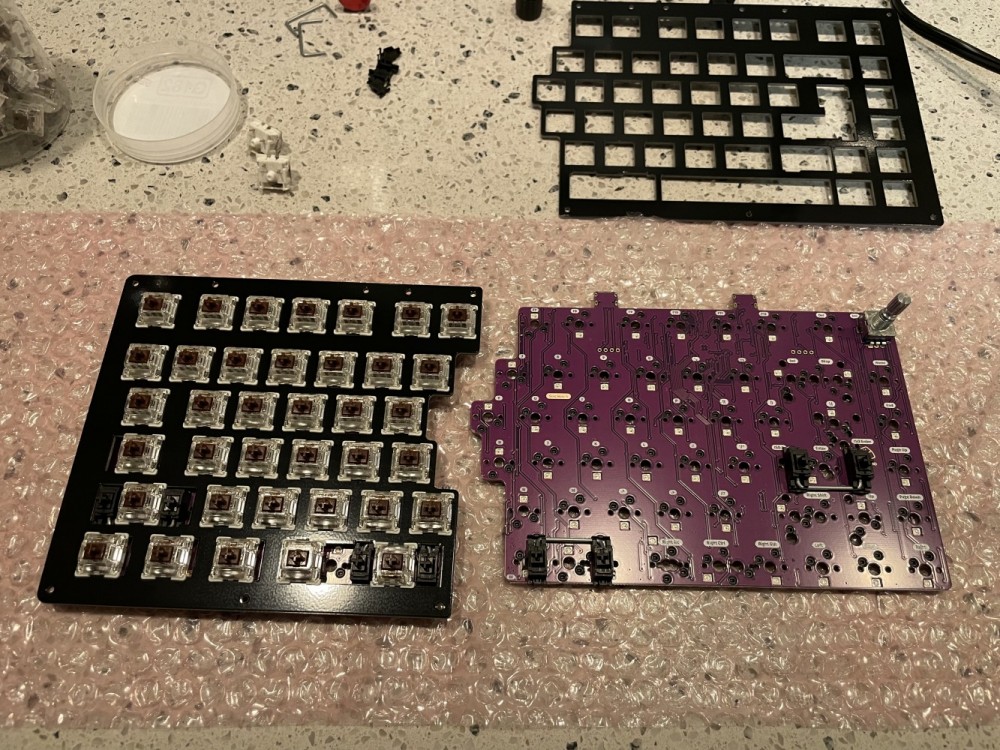

Hard to see here, but I attached the bottom plate to the top.

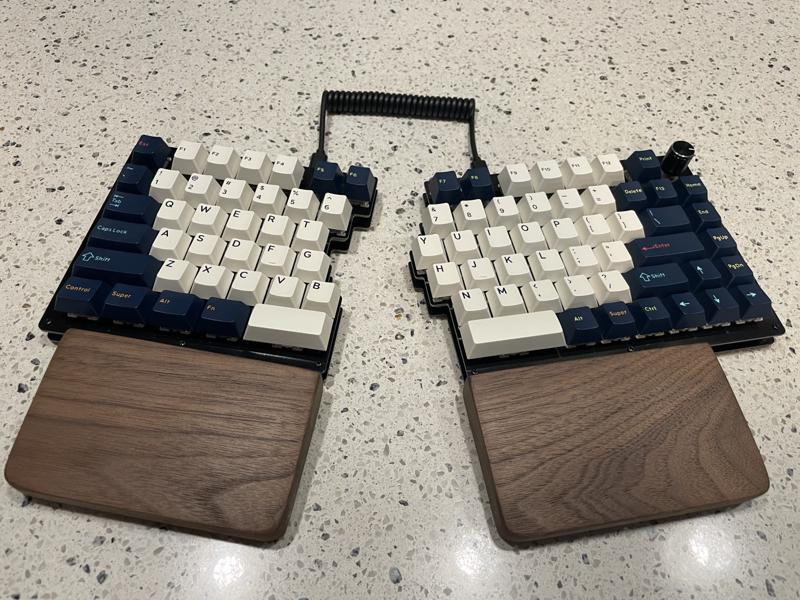
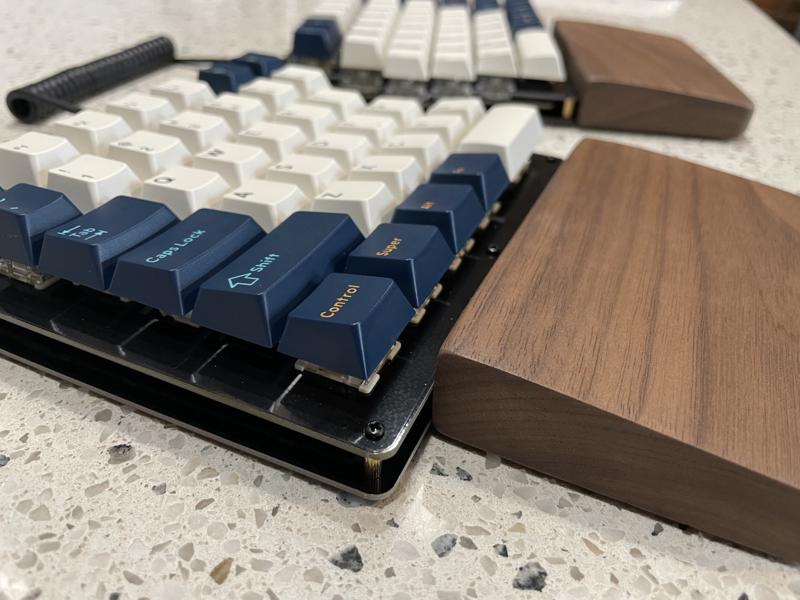
Here is the final product (note that I moved some switches around for the right-side Alt/Super/Ctrl).

Here are the obligatory blinkenlights.
Here is the clack clack (unmute the video).
Here are pictures with the wrist rest.
Build process lessons learned
I have never built a keyboard before, and to be honest, I was in a little over my head. If I could go back and do things differently, I would say this:
- I had no idea how to assemble the stabilizers (I had to watch YouTube videos) and had to pay attention to the fact that some get installed upside-right, and some upside-down
- I don’t know if I should have purchased screw-in stabilizers
- I had a keycap puller, but didn’t have a switch puller 🤦♂️, so I had to use a small screwdriver (I’ve since purchased a switch puller)
- I should have started with a less flexible board layout (this would have made keycap selection and switch positioning easier)
- I should have worked my way up to this keyboard kit by building easier boards first (e.g., starting with some barebone boards that only needed to have switches and keycaps installed)
In the end, it all worked out perfectly, but it admittedly took much longer than I thought it would.
Firmware
The Sinc supports QMK, but VIA gives you a web interface and programs the board in real-time (i.e., when you change something in VIA, it updates the board right away).
This was my first time using VIA, and I was blown away by the options. 🤯
I was able to change so many things:
- remapping keys (e.g., F13 and left-spacebar to backspace)
- rotary encoder control (turn for volume, press for play/pause)
- create multiple layers (e.g., FN+H/FN+L to move media tracks backward/forward)
- so, so, so many RGB options

Learning curve
Having the keyboard split wasn’t an issue for typing using the alphabet keys (e.g., QWERTY). However, anything requiring modifiers was a challenge to get used to. For example:
- I’m still reaching to F13 for backspace, when I should be using my left-spacebar
- the right-side Shift is smaller than the normal 2.75U
- the right-side Alt/Super/Ctrl are all 1U
- the arrow key cluster has no space around it, so I’m hitting other keys
The big win here is that as I find places I can improve, I can tweak my settings on the fly with VIA.
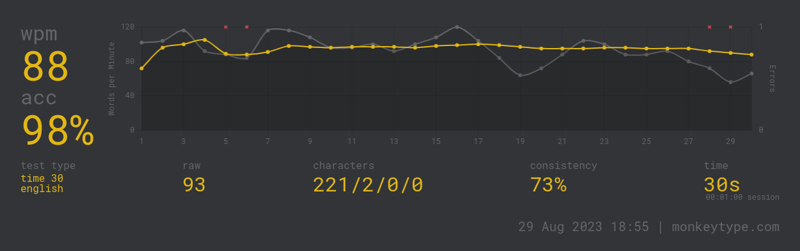
I’m not a great typist to begin with, but I think I’m able to keep up pretty well. I’m sure as time goes on I’ll become more comfortable.
Conclusion
My CODE keyboard was from a time before custom mechanical keyboards were really a thing. I can’t believe how many options there are now for boards, board layouts, switches, keycaps, and more (I haven’t even gotten into lubing switches or designing my own board).
I’m absolutely amazed by how configurable this board is and how comfortable it is to use. Paired with VIA, this provides so much more flexibility than I’m used to. I’m guessing that this will just be the first of many keyboards that I build.
-Logan
